One day I walked into my favorite yoga class and the teacher insisted that everyone in the class grab two blocks, a strap and a blanket. Up until this point I didn’t dare go near the neatly stacked yoga props in the corner. My logic went a little something like this, “I don’t know how to use them, so therefore that must mean I don’t need them.” Rookie mistake. I looked around the room to see if the other yogis were as unenthusiastic about these oddly shaped chunks of cork as I was. I wasn’t convinced.
As unenthused as I was that day now you can call me a prop enthusiast. Blocks, blankets, straps, you name it. Incorporating yoga props into my practice not only allows me to focus on alignment and safety, but also allows me to bring my practice home with me. My “at home practice kit” includes my yoga mat, two foam blocks, yoga strap and yoga blanket. After being taught how to use yoga props correctly in class I am able to confidently move in and out of poses at home without worrying if I’m straining here or stressing there.
Here are eight ways to use yoga props at home using three basic yoga props: blocks, blankets and straps. As always do what is best for your body, today.
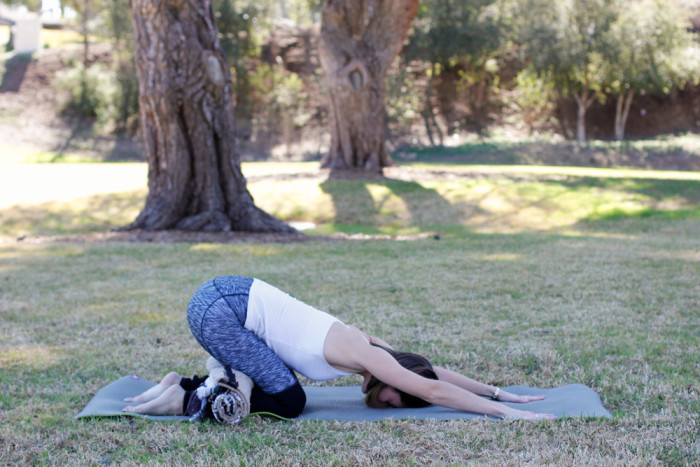
1. Rolled up Blanket in Child’s Pose to Protect the Knees
The first Child’s Pose of the practice can be hard on the knees at first. To create extra support and lift roll up your yoga blanket and place behind the knees before moving into the pose.
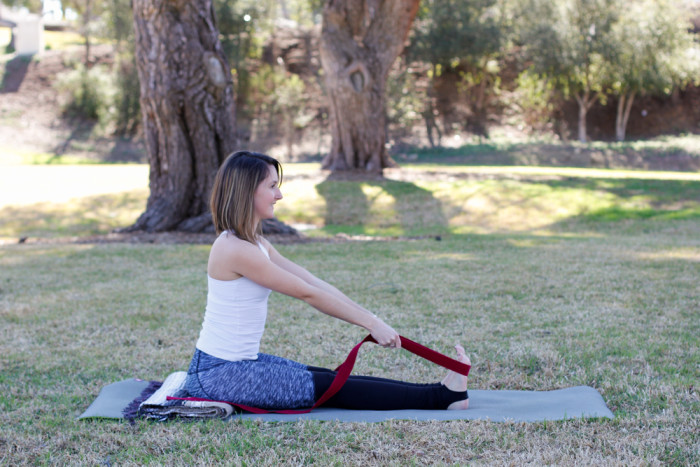
2. Blankets and straps in Forward Folds
Tight hammys? Me too. Starting with the blanket already folded how you would find it in a studio, fold the blanket in half again, bringing the straight edge to meet the fringe edge so that the blanket is now doubled up. Sit on the very edge of the non-fringe side so that you feel your pelvis tip forward. Sitting on the edge of the folded blanket versus the middle encourages the pelvis to tip anteriorly, which aligns the low back to prepare for a forward fold. If the pelvis is tipped in the opposite direction, posteriorly, and the practitioner then moves into a forward fold it puts immediate pressure on the low back, which puts you at risk for back injuries. If you’re a runner or spend a lot of time sitting at a desk, your hamstrings may be extra tight. In this case, add a strap to your forward fold. Loop the strap over the balls of your feet, holding one tail of the strap in each hand.
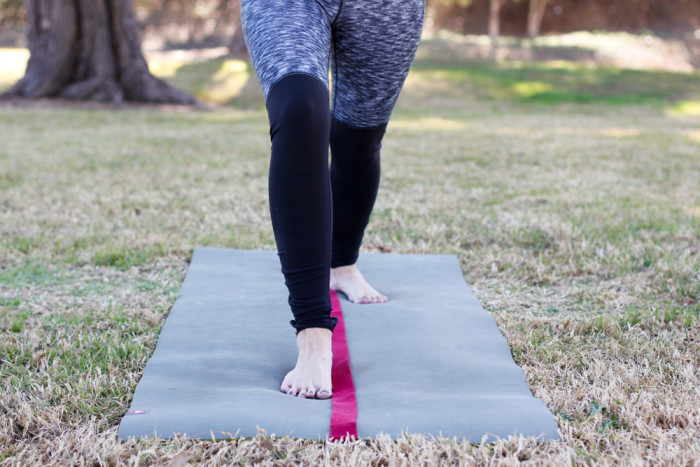
3. Align your Warrior 1
Straps aren’t just for stretching! They are also a great tool to find proper foot alignment in standing poses like the Warriors. Lay the strap down the center of your yoga mat. For Warrior 1, starting from Downward Facing Dog, place the right foot in line with your hands and alongside the right edge of the strap. Step forward with the left foot about six inches, or until you can root down the left heel. Back toes should be pointing at 11 o’clock. Peek back at the left foot and slide it in toward the midline until the inner left heel touches the left edge of the strap. Rise up into Warrior 1. Ta-da, perfectly aligned! Now on to Warrior 2.
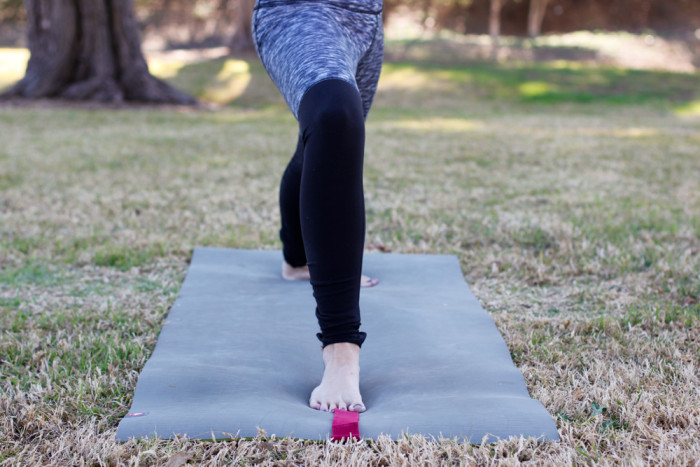
4. Align your Warrior 2
Although, Warrior 1 and 2 are often linked together in yoga sequences they have very different foot alignment and it’s important to take care to set up the right foundation so that the body doesn’t compensate elsewhere. Using the same method as before, start with the strap going straight down the center of the mat and meet me in Downward Facing Dog. Bring the right foot up in between the hands and place it directly on top of the strap. Next, leaving the ball of the foot where it is, pivot the left heel down to meet the mat. The left toes will now be pointed to the left. This should position your foot so that the toes are on one side of the strap and the heel is on the other with the strap running under your arch. On an inhale, fire up the quad and rise into Warrior 2.
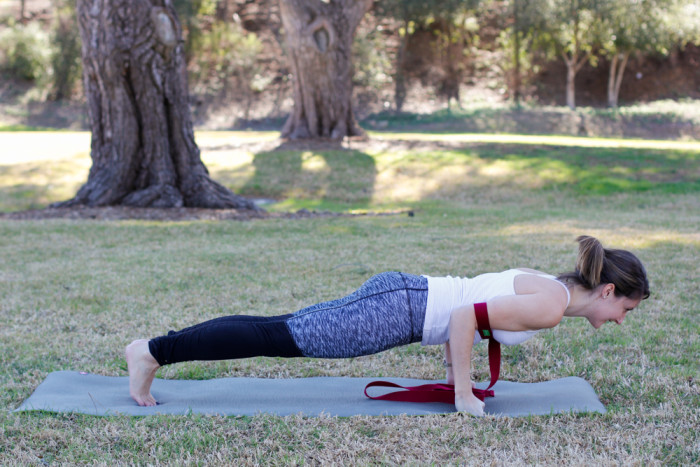
5. Chaturanga Hammock
I had to put my hair up for this one. Chaturanga is an advanced pose in the sense that it is at high risk for misalignment. During an average class, we may do Chaturanga five, 10, 15 times. Without being mindful of correct alignment we put unnecessary stress on our joints and with a heavily repeated pose like Chaturanga that can easily lead to a repetitive strain injury (RSI). The “Chaturanga hammock” supports the upper body, making this pose not so labor intensive and in turn gives you more time to feel your body in the pose and make the the appropriate micro-adjustments. First things first, loop up your strap. Take the tail and run it through both metal rings, then double back going over the first ring and under the second. Cinch down the loop until it is just a tad wider than shoulder width. Now, put both of your arms through the loop until the strap is situated just above the elbow (closer to the shoulder versus the wrist). If you move into plank and the strap falls, tighten it down just a bit more until you can hold plank without the strap falling. Great. Now, from plank, energize your toes pushing yourself forward similar to if you were peeking over the edge of a cliff. Broaden across the sternum and plug the shoulders into their sockets. Slowly lower yourself down until you feel the support of the strap. Now that you are hanging out here, are your elbows directly over your wrists? Is the elbow bent at a 90 degree angle? Draw the upper hip bones toward the front ribs to avoid any low back sway and keep the shoulders away from the ears. When you’ve had your fill lower the knees and push back into Child’s Pose. Nice work!
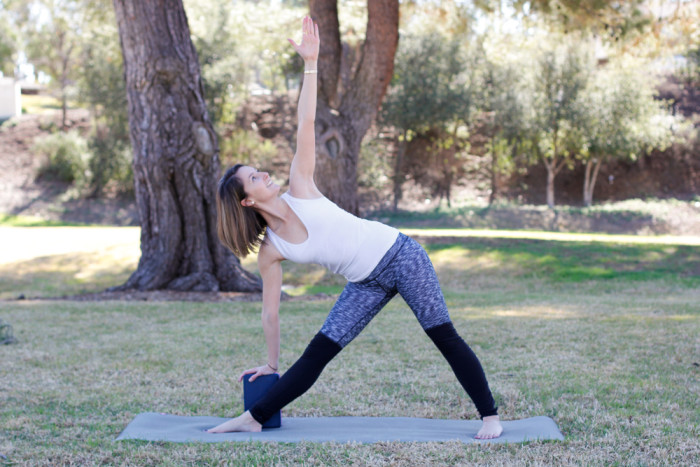
6. Raise the Floor to you in Triangle Pose
Keeping a flat back in Trikonasana, Triangle Pose, is essential to protecting the lower back. Just like in a forward fold, straining to get your hands to the mat jeopardizes the safety of the intervertebral discs. The same concept applies here in Triangle Pose. Instead of rounding your back and closing off the heart to get your hand to the mat, try placing a block next to the front calf. This allows the back to stay safe, along with creating the space needed to revolve the top ribs toward the wall behind you and the bottom ribs toward the wall in front of you.
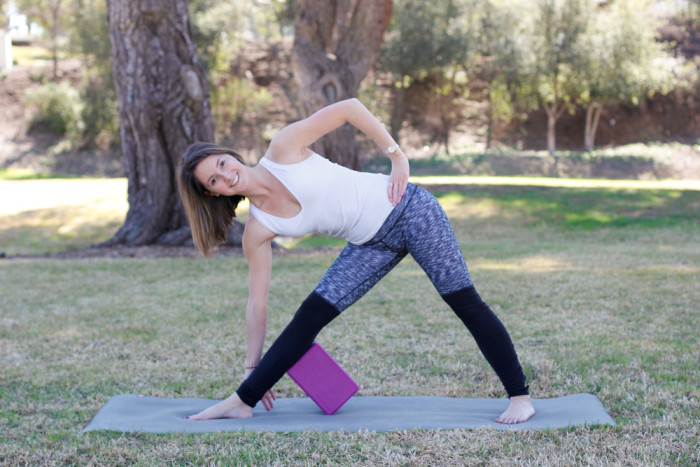
7. Block Out Knee Hyperextension in Triangle Pose
One more for Triangle Pose! This is going to help any of you who tend to hyperextend your knees. As you move into the pose place a block diagonally against the back of the calf. As you move into the complete pose you will notice that the block keeps the calf engage and moving away from the mat instead of collapsing down and sending pressure into the knee.
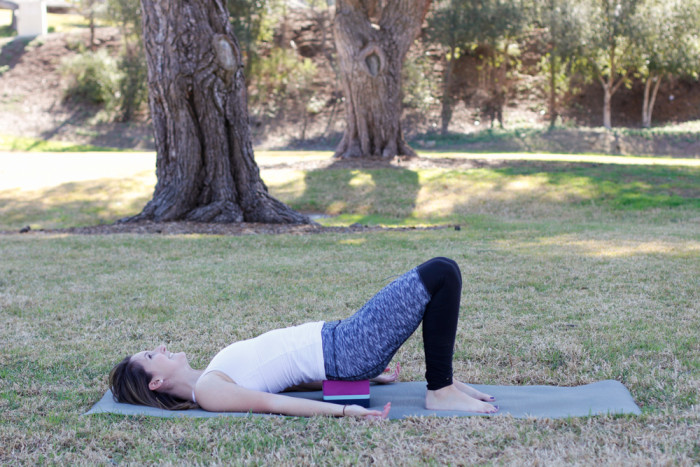
8. Gentle Modified Supported Bridge
You’ve worked hard and definitely deserve this one! Gentle cooling inversions are a wonderful way to calm the body at the end of your home practice before ending with Savasana. Inversions can also be intimidating without a teacher present to spot and lead you safely in and out of a pose. Don’t let that deter you from the benefits of inversions like increased circulation, reversal of normal daily weight distribution and calming the nervous system; all of which you can still gain from gentle inversions like this modified supported bridge pose. From your back, bring your heels so that they are directly under the knees. Rotate the inner thighs down toward the floor so much that it peels your hips off the floor. Continue to raise the hips until you can slide the block under the sacrum. Relax the hips back down onto the block enjoy. When you’re ready, peel the hips up once more and remove the block.
Also by Megan: 5 Ways to Have a Productive Day Before Getting Out Of Bed
How Metta Meditation Led Me To Self-Reflect The Hard Way
Get more like this–sign up for our newsletter for exclusive inspirational content!
__
Photo: Megan Chambley

