
- 4 dried Guajillo chiles
- 2 dried Pasilla chiles
- 2 dried Ancho chiles
- 4 dried Morita chiles
- 5 Roma tomatoes
- 1/2 large white onion, quartered
- 6 cloves garlic
- 8 whole peppercorns
- 1 tsp cumin
- 1/2 tsp ginger
- 2 tsp Mexican oregano
- 1 tsp thyme
- 2 whole cloves
- 1/4 cinnamon stick
- 3 tbsp apple cider vinegar
- 4 cups vegetable broth
- 2 Mexican bay leaves
- For mushrooms:
- 2 lbs oyster mushrooms, shredded
- 3 tbsp neutral vegetable oil
- 1/2 tbsp garlic powder
- to taste salt & pepper
- To serve:
- 12–14 corn tortillas
- neutral vegetable oil for frying
- handful chopped cilantro
- lime wedges
- white onion, finely diced
- shredded vegan cheese

Directions
Birria sauce
1. De-stem and shake the seeds out of all the dried chiles. Toast them in a skillet over medium-low for 3–5 minutes, making sure to frequently turn them so they don’t burn.
2. Once the chiles are toasted, add them to a pot with the tomatoes, roughly chopped onion, and garlic cloves. Cover with water and bring to a low boil. Reduce the heat and simmer for 12–15 minutes, or until the chiles are soft and pliable.
3. Then, add the chiles, tomatoes, onion, and garlic to a blender along with the apple cider vinegar, 1 cup of vegetable broth, and all seasonings (except the bay leaves). Blend on high until smooth.
4. Pour the sauce through a mesh strainer into a large saucepan, working it through with a spoon or spatula. Add in 2–3 more cups of vegetable broth, and simmer for 35–40 minutes.
Mushrooms
In the meantime, remove the bottom portion of the oyster mushrooms, then shred them with your hands into small strips. Season with oil, garlic powder, salt, and pepper. Toss to coat the strips, then set the bowl aside.
With 10–15 minutes left on the sauce, preheat about 1 tablespoon of oil in a large skillet over medium-high. Cook the shredded mushrooms in batches until golden-brown and crispy (about 8–10 minutes per batch).
Add all mushrooms back into the skillet with 1–2 cups of birria sauce and cook down for another 2–3 minutes.
To serve
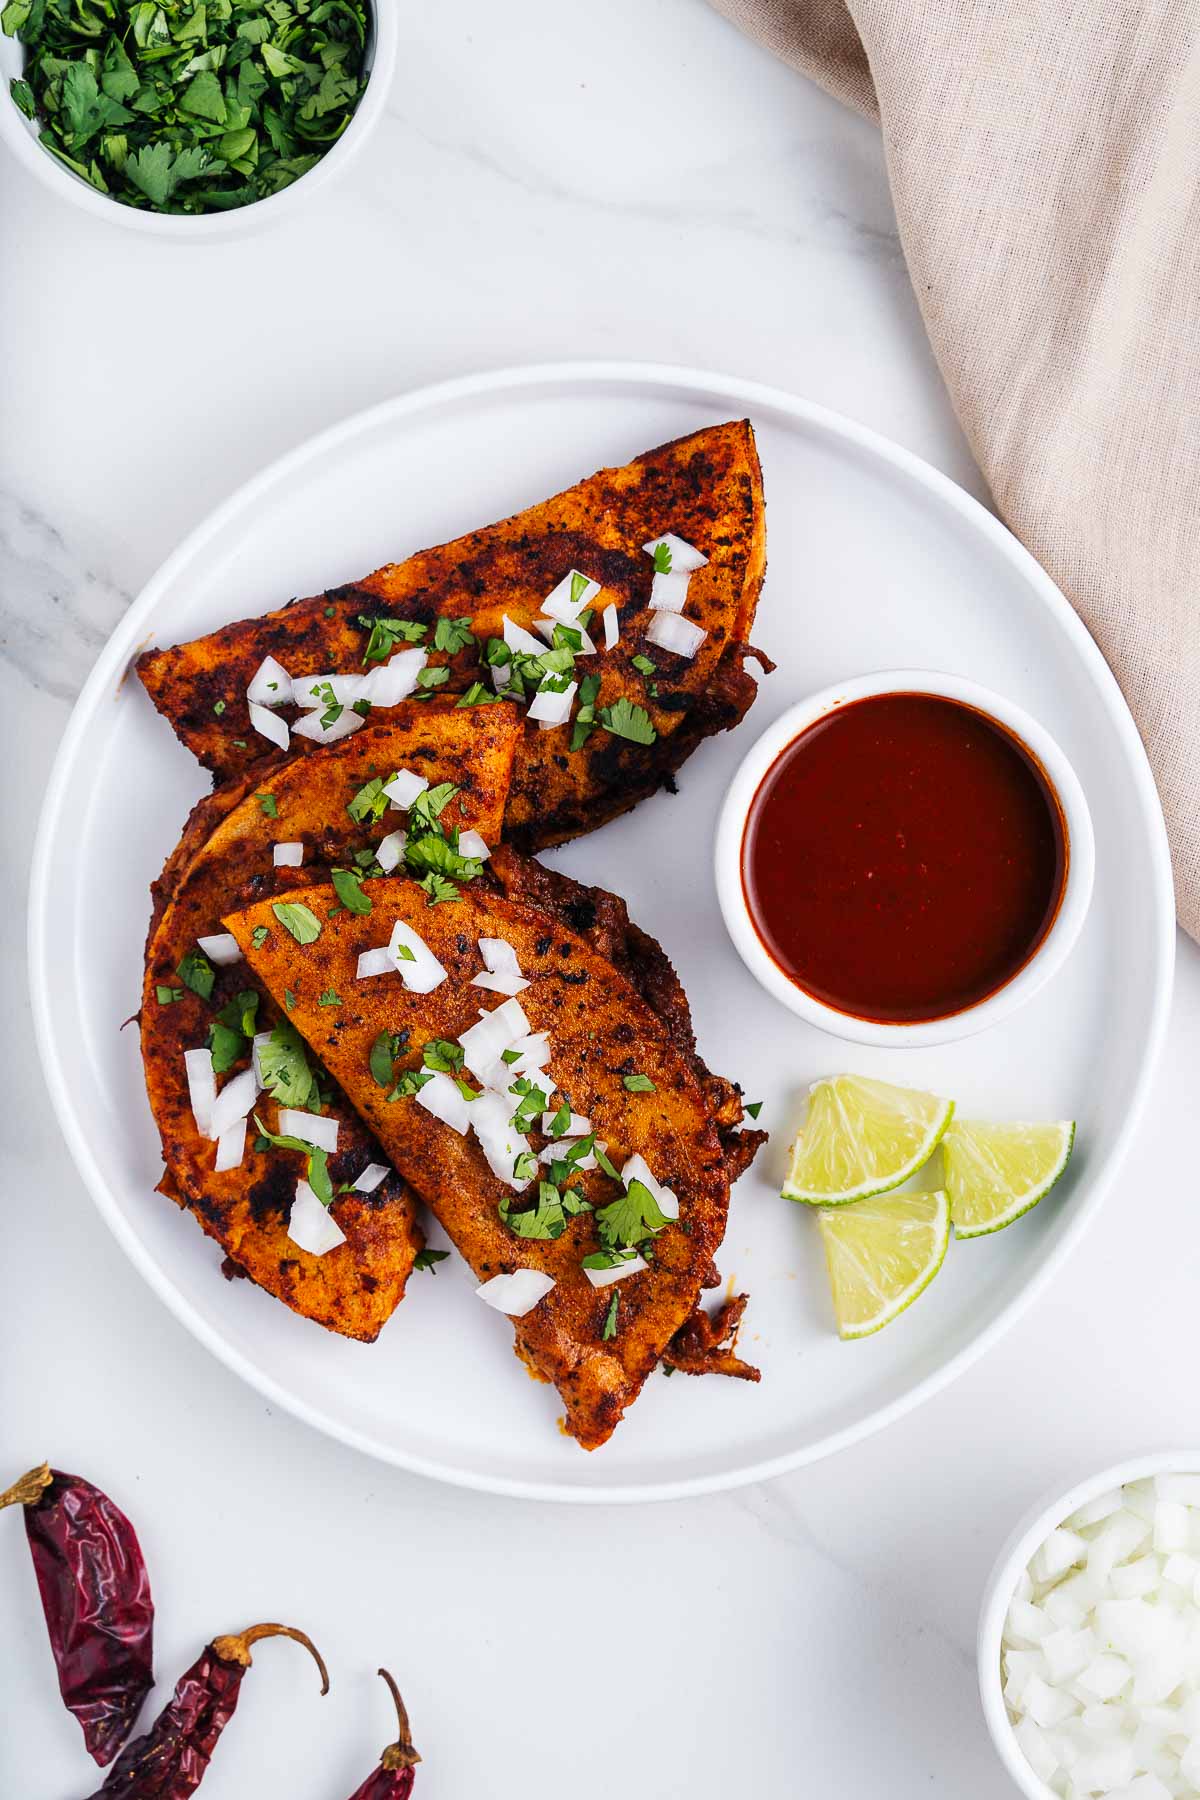
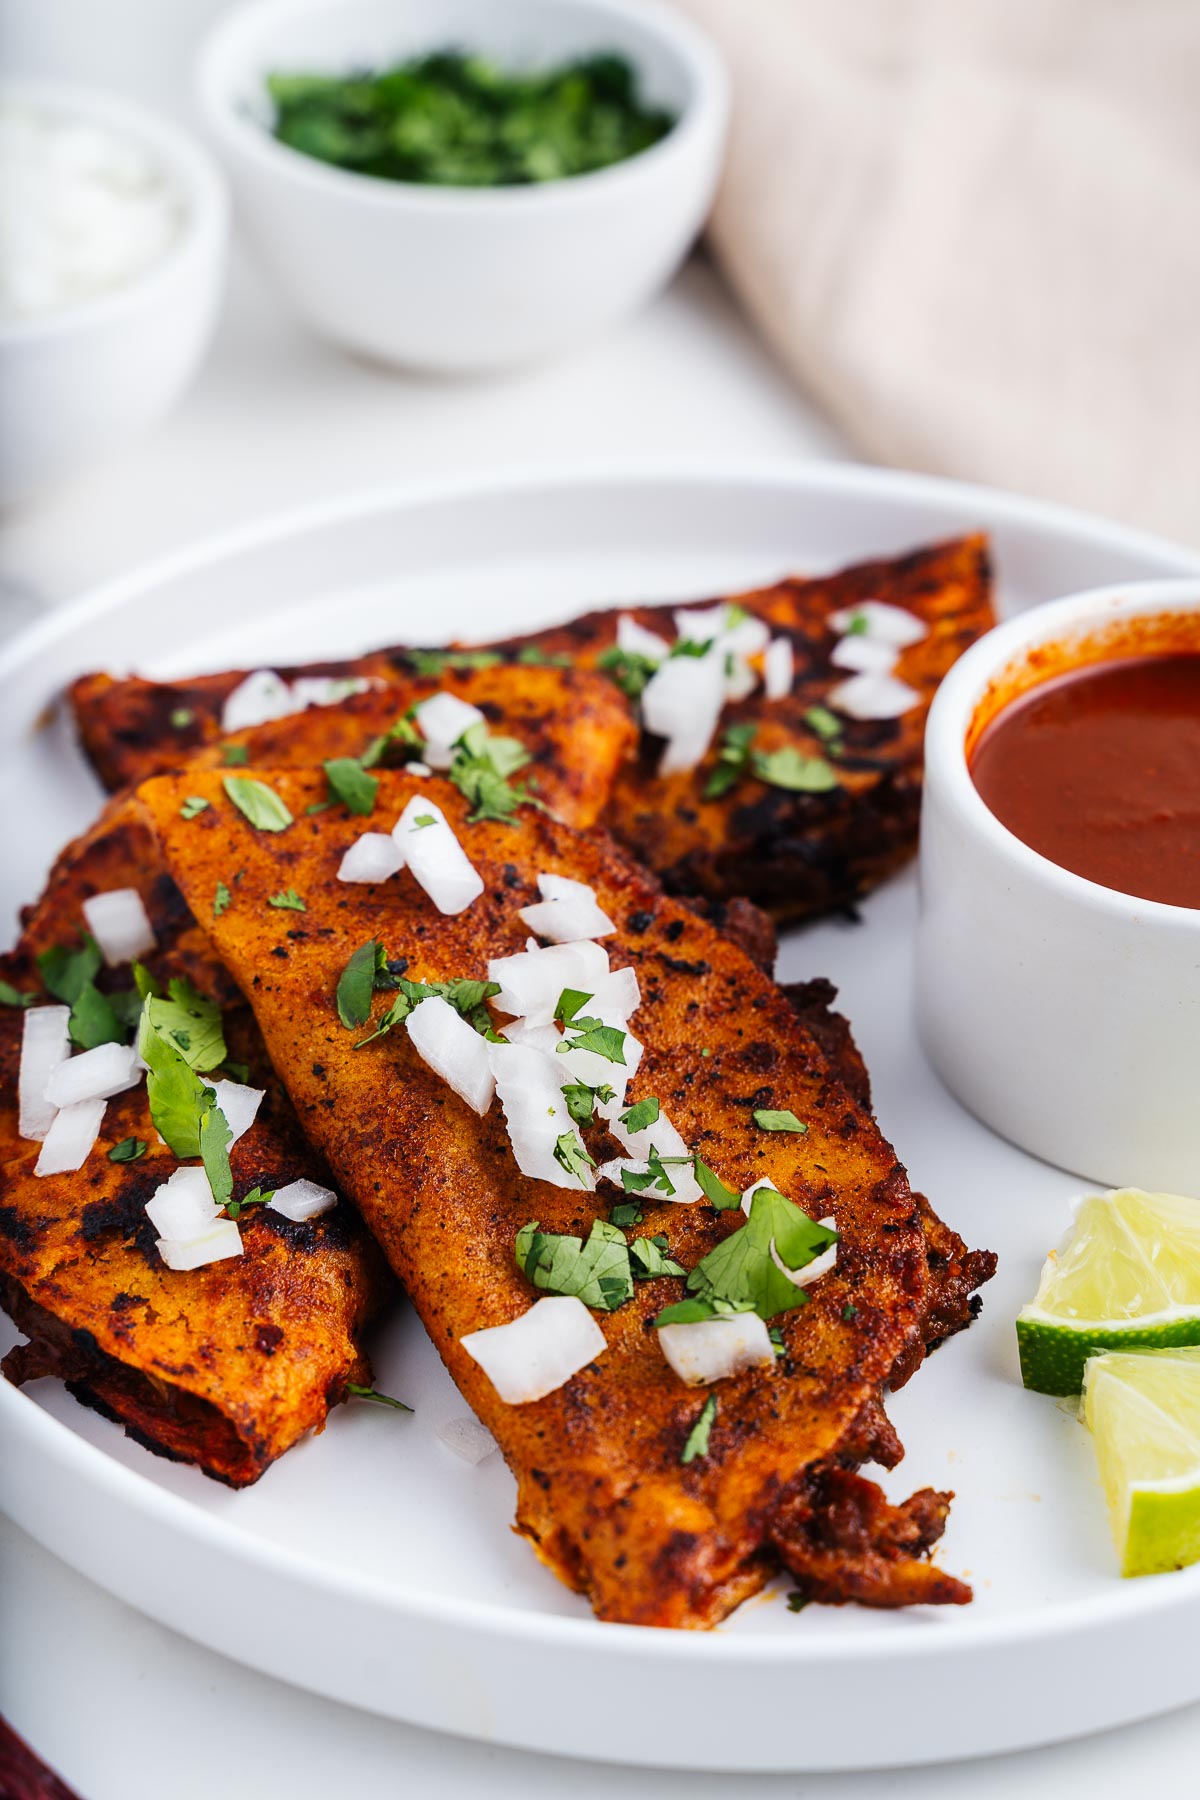
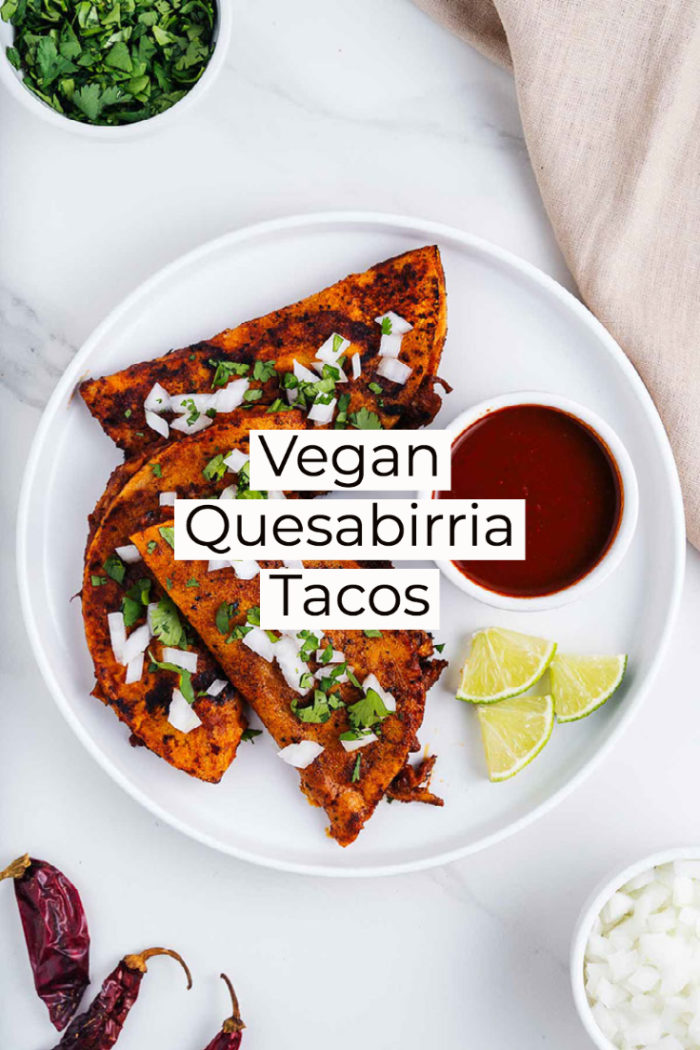
Quesabirria: heat a little oil in another skillet over medium. Dip a corn tortilla in the pot of birria then place it in the skillet. While it’s cooking, add a scoop of the mushroom mixture and a handful of shredded vegan cheese (optional) to one half of the tortilla.
Fold the tortilla over the fillings and cook for another 12 minutes on the first side. Flip and cook on the second side until the outsides are crispy and the cheese is melty. Continue this process until all the tacos are made.
Serve with a topping of diced white onions, chopped cilantro, lime wedges, and a side of birria sauce.
Stew: serve the mushrooms directly in the birria with a garnish of onion, cilantro, lime wedges, etc.
Tacos: serve the mushroom mixture inside fresh corn tortillas with garnishes of your choice. Happy eating!
Get more like this—Sign up for our daily inspirational newsletter for exclusive content!
__
Photo: Mitch and Justine Chapman