Eyebrows are too often under-appreciated (as are backs, in my opinion!) We spend a great deal of effort on our lips, skin, and lashes and sometimes forget the dramatic power of the brow to accentuate the beautiful contours of our faces.
I believe in respecting the natural shape of our eyebrows and not over-tweezing—no matter which brow style is in at the moment. I know my own, thinner brows could never go as bold as Audrey’s (without some serious cosmetic enhancement), but I like them as full (and tidy) as possible.
Eyebrows are naturally asymmetrical. Think of them as sisters rather than twins.
DIY Brow Shaping:
1. Make friends with the tweezers. The brave among us may have conquered the art of at-home bikini waxing (my kudos to you!), but at-home brow waxing is another feat entirely. Most of us are best off leaving waxing and threading to the pros. Shaving the brow area can be risky, as far as your beauty is concerned, and is ultimately inefficient since hair will grow back faster if it’s not removed at the root.
With a little patience and practice, tweezing your own brows will become second nature. Select tweezers that are designed specifically for brow tweezing. General tweezers will work, but special brow tweezers (which aren’t necessarily more expensive) will rock your world.
I use two styles of tweezers: pointed tweezers are perfect for nabbing individual hairs underneath the brow. Flathead tweezers are great for the small, hard to grasp hair between the brows.
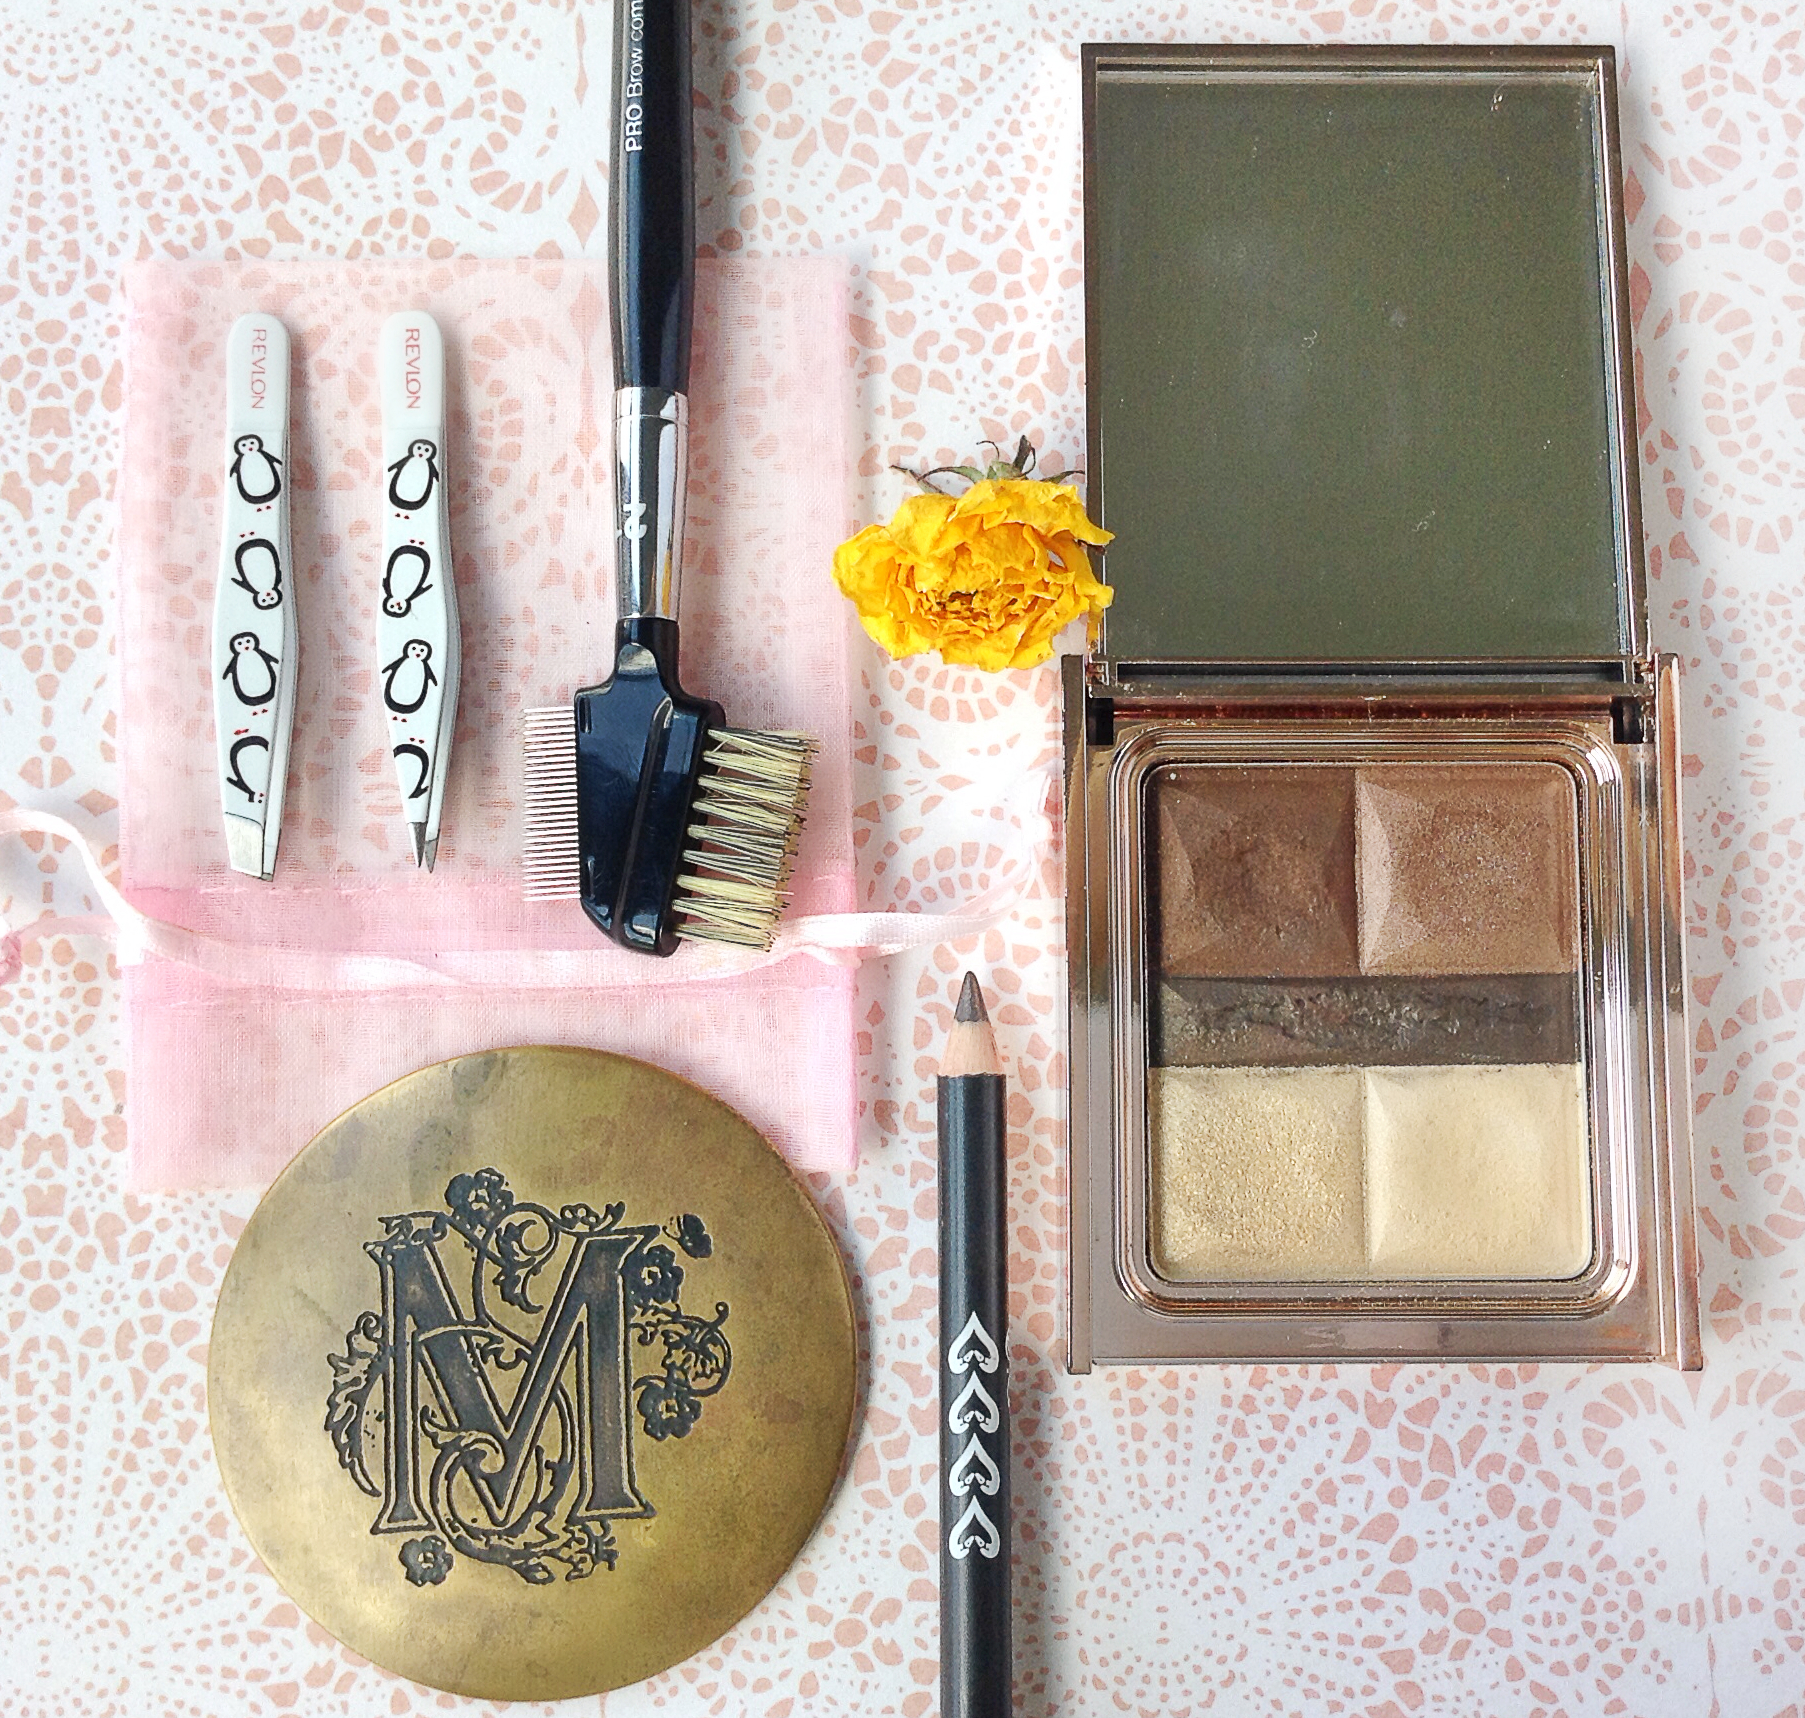
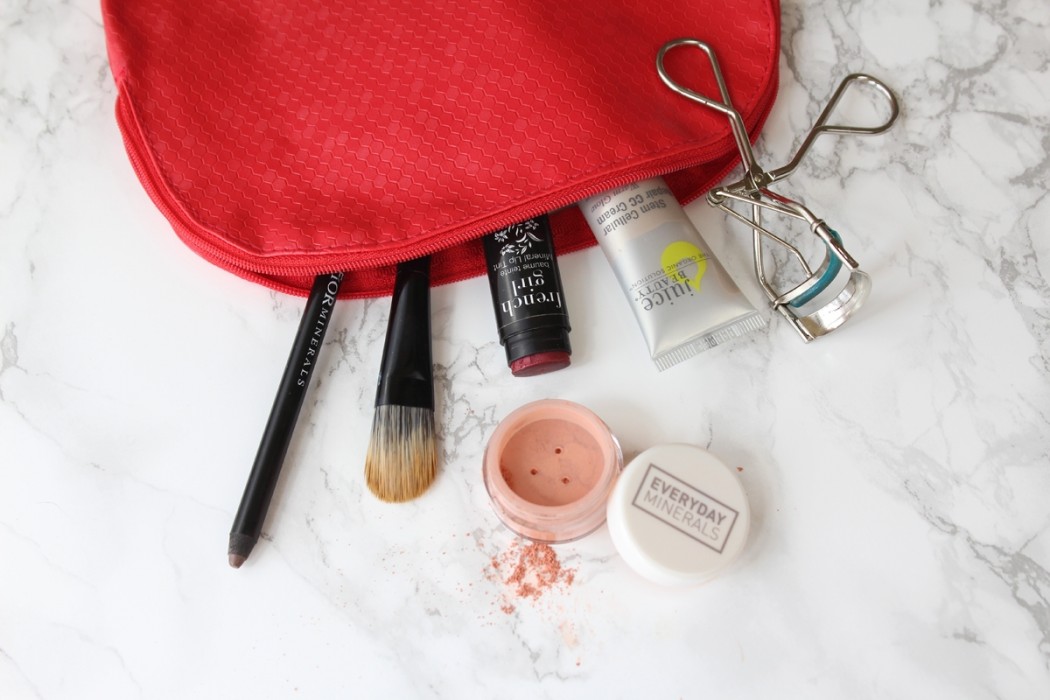
Tools for Beautiful Brows: flathead tweezers, pointed tweezers, brow comb, eyebrow powder (eyeshadow), eyebrow pencil (eyeliner), and mirror.
2. Determine your brow shape. If you’re starting with virgin eyebrows, there are a few simple rules to help you determine how you’ll shape your brow. If a rule contradicts the natural shape of your brow, break the rule.
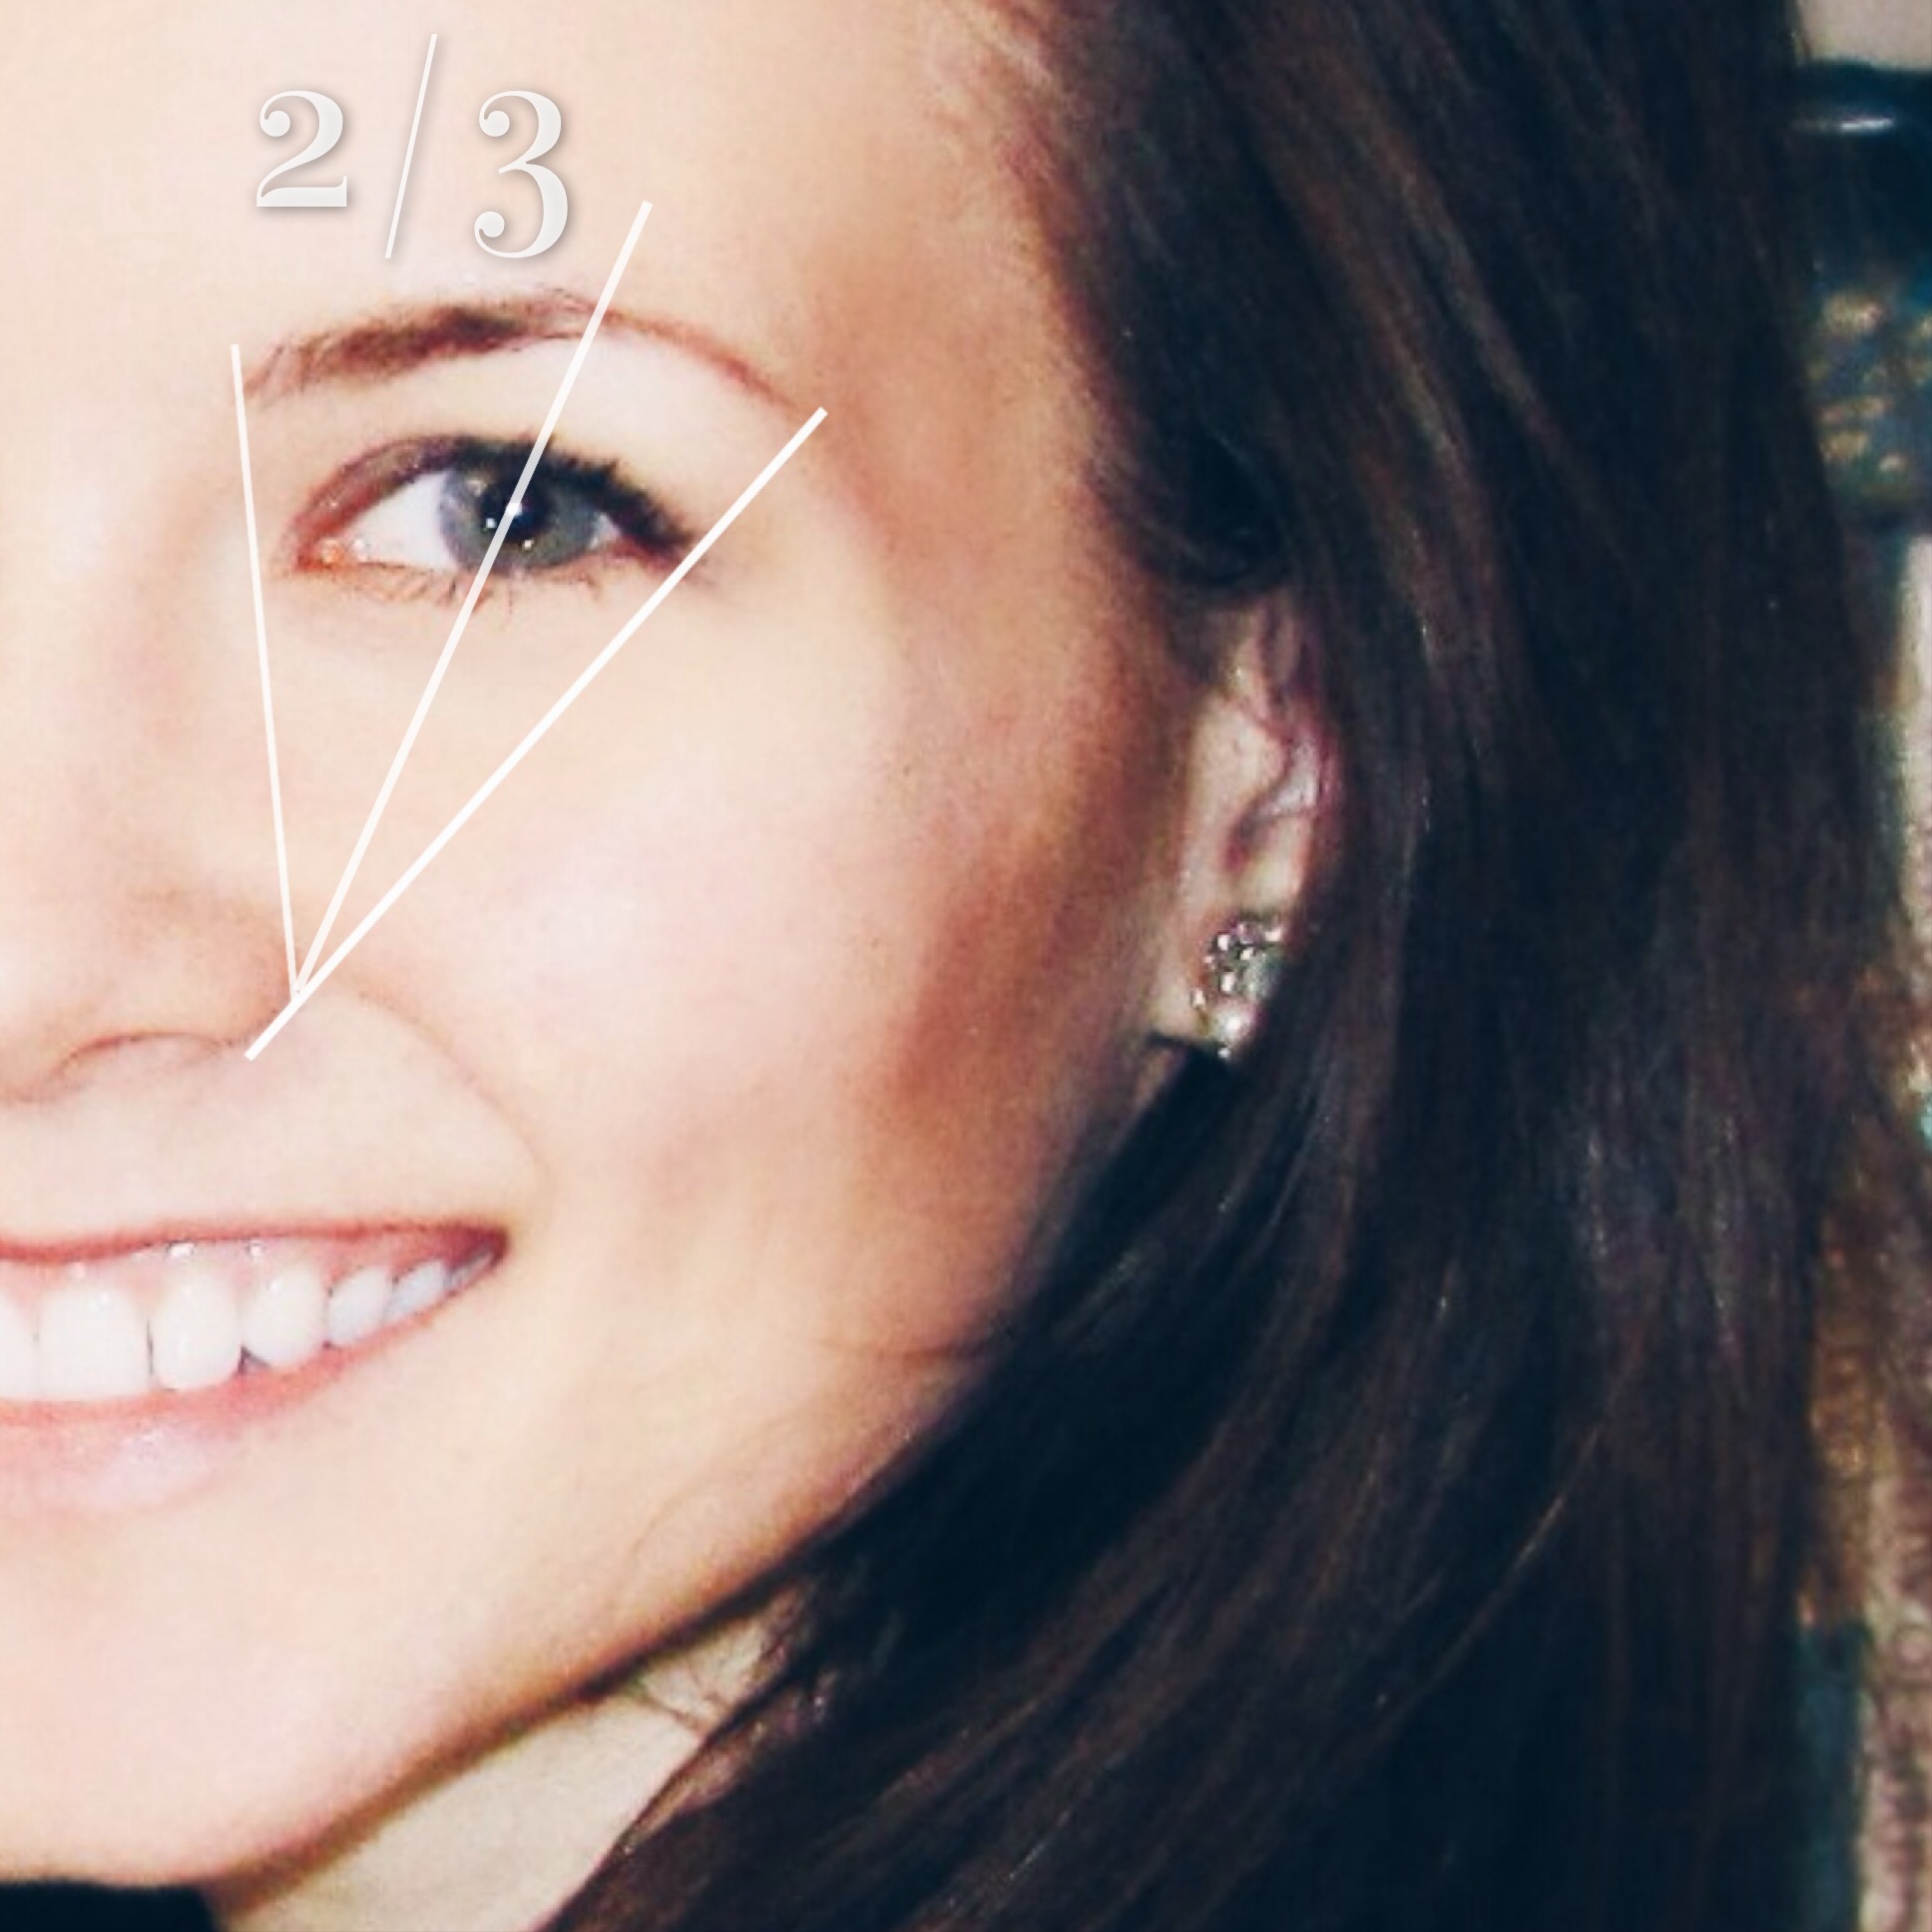
We’ll start in the center and work our way out.
To find where your brow should begin, hold a pencil against the base of your nose and line it up with the inside corner of your cornea. Where the pencil meets your brow is where your brow should begin. Draw a dot with eyeliner here to help guide you as you tweeze.
About 2/3 into your brow is where your natural arc probably occurs. It’s best to work with this natural shape and enhance it through careful grooming–rather than trying to rewrite your brow!
To find where your brow should end, hold a pencil against the base of your nose and line it up with the outer corner of your eye. Where the pencil meets your brow is where you may consider ending your brow. (I love the look of long brows, so if my own actually extended beyond this point I would probably leave them alone!)
Once your find your brow shape you can draw it on with an eyeliner pencil to help guide you.
3. Select the right mirror. It’s tempting to use a magnifying mirror when tweezing your eyebrows, but up close brows look extra hairy, and it’s easy to over-tweeze them! Once you have a good sense of the shape of your brow, a magnifying mirror comes in handy as you maintain them, a few hairs at a time.
4. Tweeze one hair at a time.
5. Tweeze at the root and pull in the direction of its growth. (Less pain!)
6. Work on both brows simultaneously to keep them as even as possible.
7. Soothe your brow post-pluck. The eye area can be sensitive (duh!). If your skin stings a bit after tweezing, apply ice or a calming lotion formulated for sensitive skin. Eye cream works well, too.
Brow Makeup:

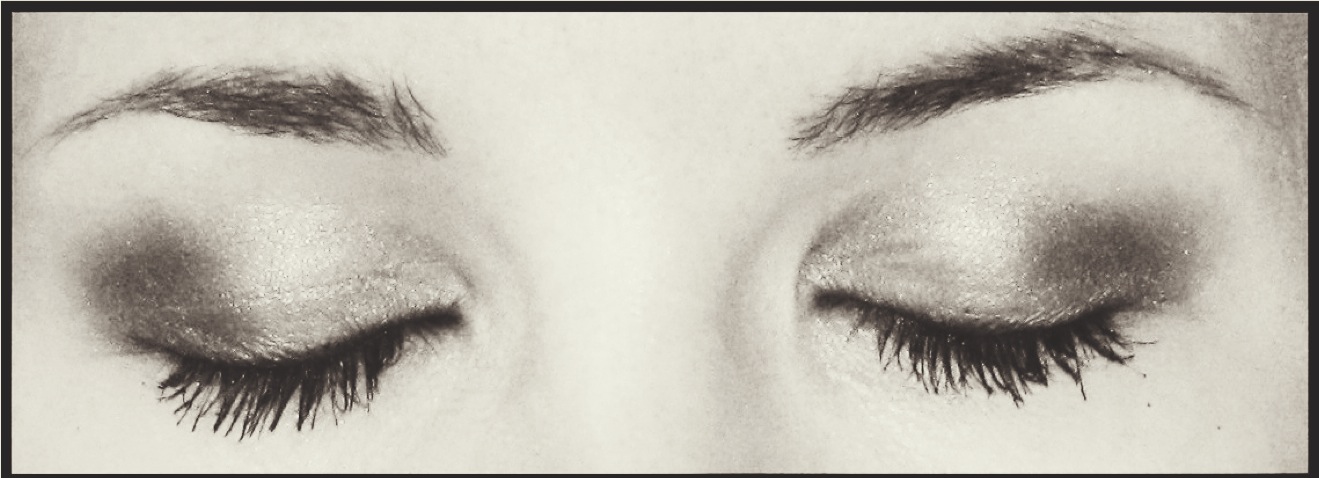
I’ve filled in my brows using a brown eyeshadow.
There are a slew of brow powders, waxes, and pencils that can help you create your dream brows, but I’ve always gotten by with an angled brow brush and eye shadow. Alternatively, a matte eyeliner could work as well.
Tips for easy, pretty brows every time:
1. Brow filler should be a shade lighter than your brow. Anything darker may look unnatural and overly dramatic. Your brow makeup should not be obvious.
2. If you’re using a pencil, draw only short strokes in the direction of the hairs–a solid line will look too obvious.
3. Apply brow powder in light feathery strokes. Sometimes wetting the brow brush before dipping it in powder offers you more control.
4. Gently brush your brows into shape with an eyebrow brush or clean mascara wand. You also have the option to finish them with clear mascara or brow sealing wax. In high school, I used to dab a little hairspray on my finger and smooth it over my brows, but it was kind of a hassle (and I don’t think it made a huge difference since my brows aren’t particularly unruly)!
5. Give your brows a lift by applying a highlighting eyeshadow along your brow bone (underneath the eyebrow itself).
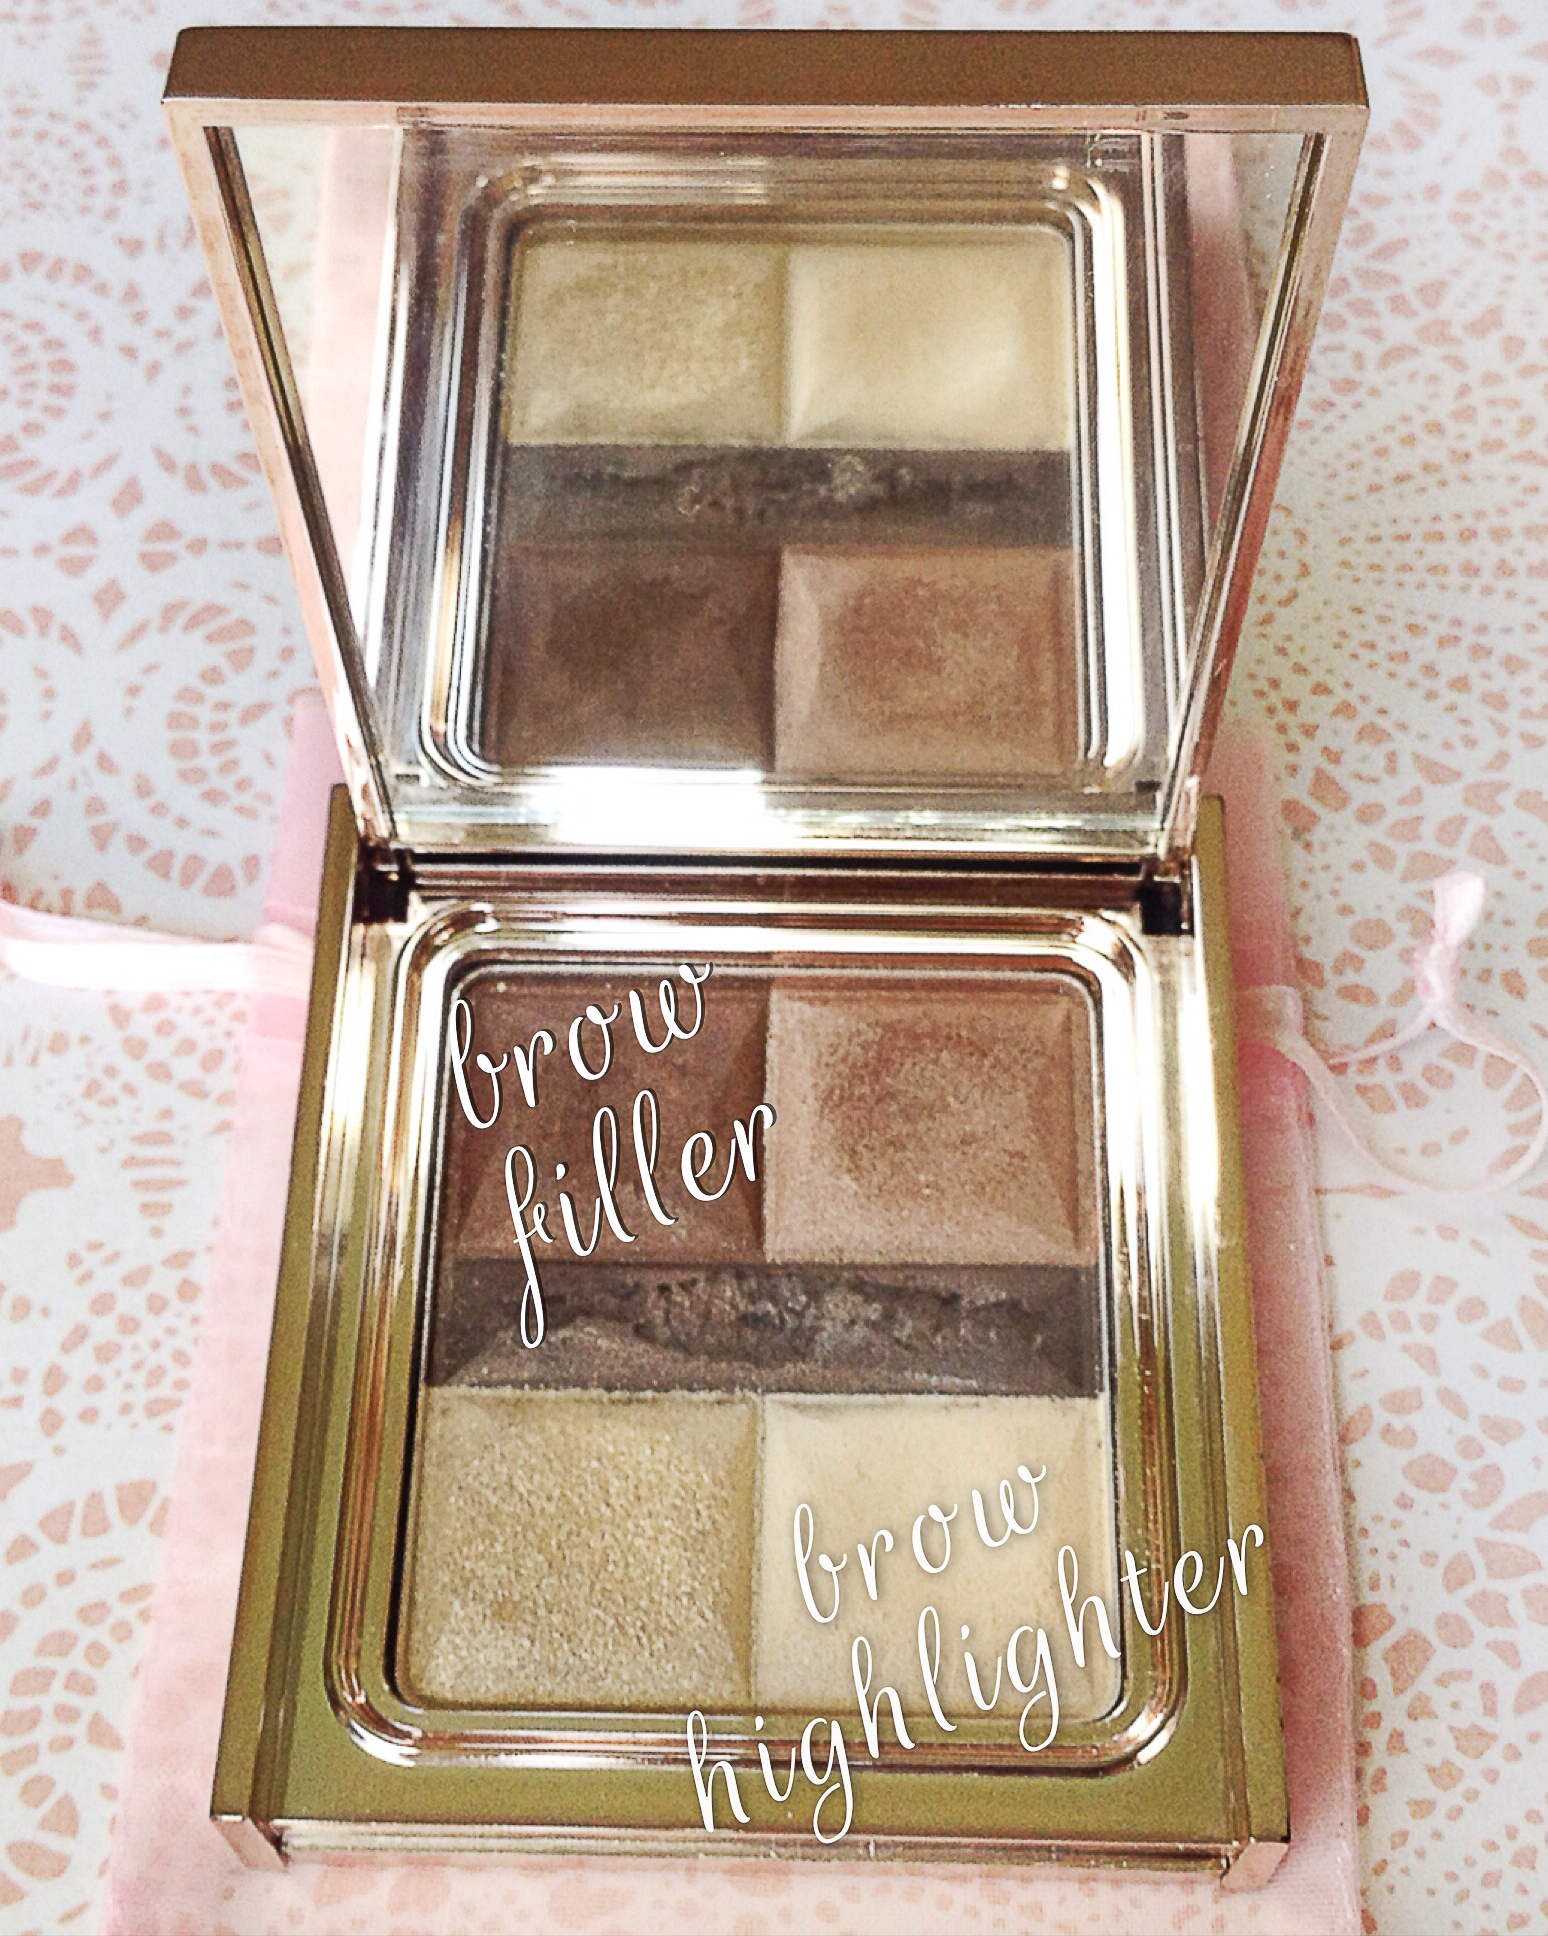
My good old Josie Maran eyeshadow palette does double duty as brow filler and highlighter.
More in Beauty Secrets: Natural Sunless Tanning
Blush Basics for a Radiant Glow
Photos: Laura Loveday via Flickr, Mary Hood