Almond milk is a mild, creamy beverage that serves as a great dairy replacement option. It’s loaded with potassium and zinc with fewer calories and none of the saturated fat or cholesterol found in cow’s milk. Sadly, some store bought almond milk brands contain some not-so-great additives like heaping tablespoons of sweeteners, and carrageenan, a coagulent that may cause inflammation. Luckily, making your own almond milk at home is ridiculously easy. And I say this as someone who seriously lacks the Martha Stewart gene, so if I can do it, so can you! Let’s get started:
 DIY Almond Milk Recipe
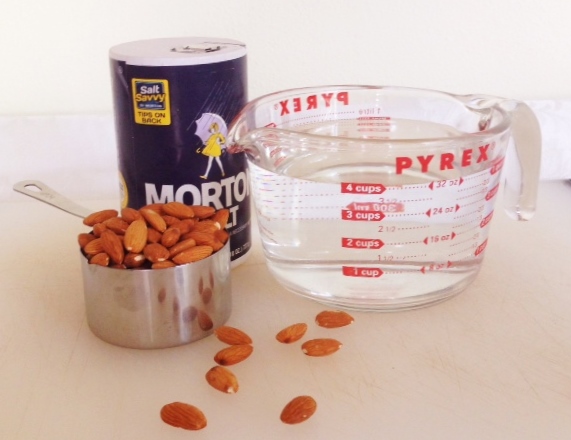
Ingredients:
2 cups raw almonds
4 cups filtered water (plus water that will be used to soak the almonds)
1 tsp salt
Optional: vanilla extract or the sweetener of your choice
Equipment:
Bowls
Blender or food processor
Straining device. I used a nut bag (yes, it’s actually called a nut bag. Why are you laughing?), but you can also use cheesecloth
Instructions:
Step 1: Soak the almonds. In a glass, jar, bowl, or whatever you have on hand, pour water over your almonds until they are just covered. Stir in a teaspoon of salt, which will help draw out some of the natural phytic acids and other anti-nutrients found in raw nuts. Leave your almonds to soak overnight—they should soak for at least 12 hours, but you can leave them for up to 2 days. The longer they soak, the creamier the milk.
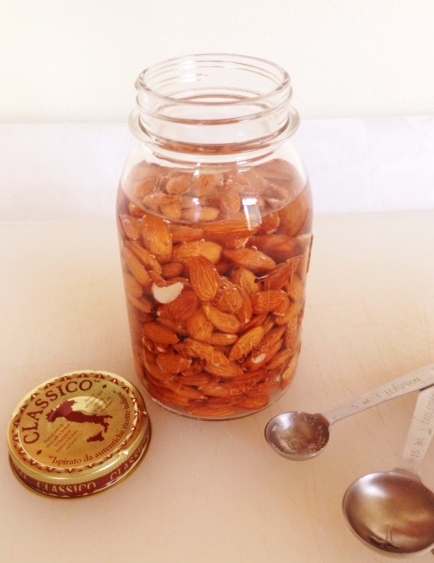
Soaked for 24 hrs
Step 2: Drain and rinse the almonds. At this point they should be just a bit squishy when pinched.
Step 3: Transfer almonds to blender. Dump almonds into a blender or food processor and add 4 cups of water. The general ratio is 2 cups water to 1 cup almonds, although you can adjust more or less depending on how thick you prefer the almond milk.
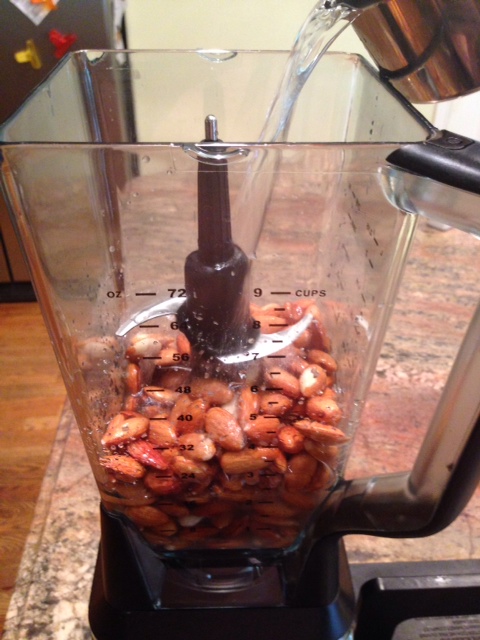
Step 4: Blend the almonds. Pulse the blender a few times to initially break up the almonds, then turn it up on high and blend for a couple minutes or until the almonds are in teeny tiny bits.
Step 5: Strain the almonds. Place nut bag or cheesecloth over a bowl, and pour the blended almond mixture into the sieve. Once all of the mixture is poured, twist the bag and squeeze the milk from the almond meal.

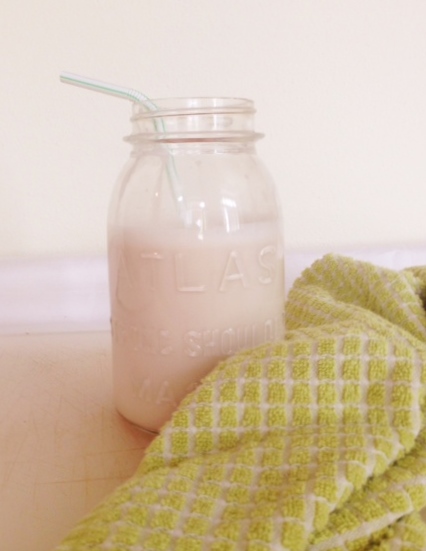
Step 6: Sweeten to taste. Pour the almond milk into a clean glass container. Give it a taste test and add whatever sweeteners you fancy. I chose to add a dash of vanilla extract with a sprinkling of nutmeg and cinnamon.
Step 7: Enjoy! The almond milk will only last 5-7 days, so make sure to enjoy it quickly.
This was gone approximately 1 hour later.
And that’s all there is to it! Now, I know what you’re thinking: What the heck do I do with all of this leftover almond meal?! Whatever you do, do NOT throw it away! Almond meal is surprisingly expensive. You can add the leftover meal to oatmeal, bread or muffins.You can also dry it out on a parchment lined baking sheet (on the lowest heat possible, let sit for 3-4 hours until completely dried) then blend the meal in a food processor to make almond flour.
Do you make nut milk at home? What are your favorites? Please share!
Also by Sarah McEwing: Natural Beauty – Natural and Organic Labels Decoded
Related: Easy Homemade Vegan Nut Butter
How to Make the Best Homemade Hummus
Photo: Sarah McEwing