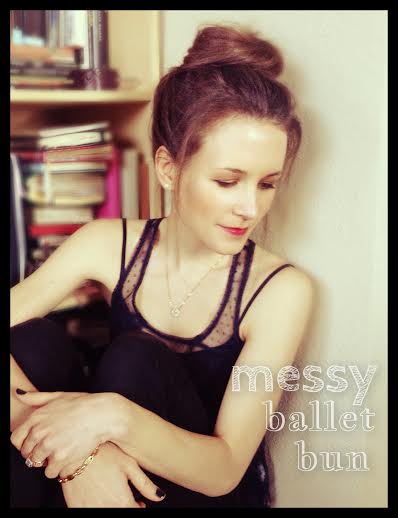
The coy, perfectly disheveled ballet bun is having a moment—and has been for a few years now. (Should we send our thank you notes to Black Swan?)
The off-duty ballerina bun is perfect for second-day hair. It hides your unwashed (though clean enough hair) while giving you a flirty, posh-casual flair. Now let’s get down to it!
You will need:
1.5” barrel curling iron (if you have straight hair).
strong-hold hair spray—I’m using a natural, vegan hairspray: Giovanni: Eco Chic Hair Care L.A. Hold Hair Spritz
5-10 bobby pins, depending on the texture and cooperativeness of your hair 🙂
1 hair elastic big enough to hold all of your hair
hair brush
Directions:

Step One: Using a large-barreled curling iron, curl the ends of your hair towards your face.
Step One: If you have fairly straight hair like me, you may want to curl the ends of your hair with a 1.5” barrel curling iron. (Any size of curling iron is fine—the fatter ones just make the process go a little faster). This step is optional, but if some of the hair falls out of your bun, it may look better if it has a slight wave.
Keep things simple and quick by curling the ends of your hair toward your face. Lightly spray.

Step 2: Create and adjust a ponytail.
Step Two: Flip your head upside down, and pull hair into a high ponytail. Holding your high pony with your hand, flip your head back up and adjust the position of your pony. (I like mine to sit on top of my head—but any position is fine!) To create an organic look, avoid using a hairbrush to smooth your hair–rake with fingers instead. Secure with a hair elastic. After tying up my hair, I usually pull out a few face-framing pieces and further adjust the position of my ponytail.
Step 3: Grab the end of your ponytail and gently backcomb with a hairbrush. This step is also optional, but it’s a great way to get a little volume!

Step 4: Twist ponytail into a rope.
Step 4: Loosely twist your ponytail into a rope.

Step Five: Twist hair into a bun and secure.
Step 5: Wind the rope around the base of your ponytail. Tuck the end of your pony tail under the bun you’ve just formed and secure with a bobby pin. Carefully adjust your bun. You can create the illusion of more volume by slightly loosening (without completely pulling out) the hair in the bun.
Step 6: Secure your bun by inserting bobby pins around the base of the bun and against your head. Make sure to catch a little bit of the hair from both bun and surrounding hair. Give it a good spray!


Look at me not even caring that the wind is making my messy ballet bun even messier!
Photos: Mary Hood