About 10 months ago, I posted about trying a derma roller for acne scars. The scarring I was trying to target was/is atrophic scarring, or rolling scars—the kind where there are slight indentations in the skin over a large swath of skin. There are a few different kinds of atrophic acne scarring, including rolling, boxcar, and ice pick scars.
I’ve given a few updates in the comments section of my previous post, but I wanted to go more in-depth with my derma roller before and after results and share some insights and techniques I’ve learned along the way.
My Derma Roller Routine
My derma rolling routine has changed a bit since I first started. Initially, I used a 1.5mm derma roller once every 6 months. After reading a study on derma rolling in which patients were “rolled” once a month with a 1.5mm roller, I decided to do a session once a month, too. The study reported that “out of [36 patients], 34 achieved a reduction in the severity of their scarring by one or two grades. More than 80% of patients assessed their treatment as ‘excellent’ on a 10-point scale. No significant adverse effects were noted in any patient.” (The grades they refer to address the noticeability of scars as “social distances” and whether or not they can be easily concealed.)
After reading the study, I also varied my rolling technique in a few ways.
1. I no longer worry about bleeding. Initially, I was concerned that bleeding may be a sign that I’d gone too far, so I used a rather light touch. But the study explained that “the endpoint for any treatment session was the presence of uniform bleeding points over the scarred area.” I now apply more pressure, and I go more slowly. The combination of increased pressure + going at a snail’s pace = more uniform pinprick bleeding. FYI: The bleeding does not create scabs.
2. This study also helped me understand the importance of holding my skin taught during the treatment: “In patients with deep-seated scarring, the skin was stretched in a perpendicular direction to the derma roller movement so that the base of the scars could also be reached.” This is kind of tricky—especially on my cheeks (where most of my scarring is) because they tend to “sink” against pressure much more than more naturally taught places like my forehead.
With this new technique, I tend to do fewer passes over the skin. Admittedly, I get impatient/bored and tired of feeling the pain—because applying more pressure and going more slowly hurts more. I’ve yet to try a topical numbing treatment, but I think one may be in order! These days, I may do five passes in one direction, five passes the opposite direction, and move on. The areas the I target tend to be smaller. For example, instead of running the roller along my entire cheek, I’ll just focus on three square inches of skin at a time.
From the beginning, I varied the topical treatments I used immediately after derma rolling, so I’m afraid I don’t have many insights there. I usually use a calming toner (that includes aloe and hyaluronic acid, which hydrates) and an antioxidant serum. I ALWAYS follow with moisturizer and SPF. I often plan my derma rolling session around weather and planned outings. (A cloudy weekend that I plan to spend inside is perfect for derma rolling!) I skip wearing makeup for at least 24 hours.
Derma Roller Before and After
The good news is that I have noticed results—on multiple fronts:
Immediate results (occurs 1 day – 1 week after a session—but not lasting forever):
-My skin looks plumper and more supple.
-My pores appear smaller (although I’m not sure if they’ve truly shrunken).
-Fine lines are diminished.
-My skin GLOWS, and I feel like I need less makeup.
Long-term results (occurring several days after treatment and probably lasting forever):
-Hyperpigmentation from post-acne marks fades more quickly.
-Atrophic/rolling scarring is less noticeable. If I’m going off the grading scale (linked above), I would say that before I ever began rolling, my scarring was a grade three: “not easily covered by makeup.” I definitely think it’s closer to a 2 now: “not obvious at social distances.” I generally feel more confident about my scarring. At this point, I would say that it’s light—not too noticeable unless you were looking for it or saw my skin at just the right angle.
That being said, I think it’s hard to grade one’s own skin! I am so used to looking for the scarring, that I may be able to notice it more easily than someone who wasn’t as familiar with the landscape of my face.
The results are quite gradual, but because I am seeing some, especially with repeated treatments, I still feel pretty encouraged.
I took the following photos over the course of two months (and two treatments following my new method). Oddly, it’s kind of hard to capture my scars on camera (yay?), and I need to get in the right light and angle. The photos were taken with a selfie cam (ugh), and I was sitting in the same spot (in natural light) around the same time of day. I am wearing a sheer layer of mineral powder in each photo. Full disclosure, I think I look, uh, less than lovely in these photos, but I hope they help you see that the derma roller does produce (gradual) results. I think you can really tell on my temple. (You may need to open the image in a new tab to zoom in on my face. *sighs*)
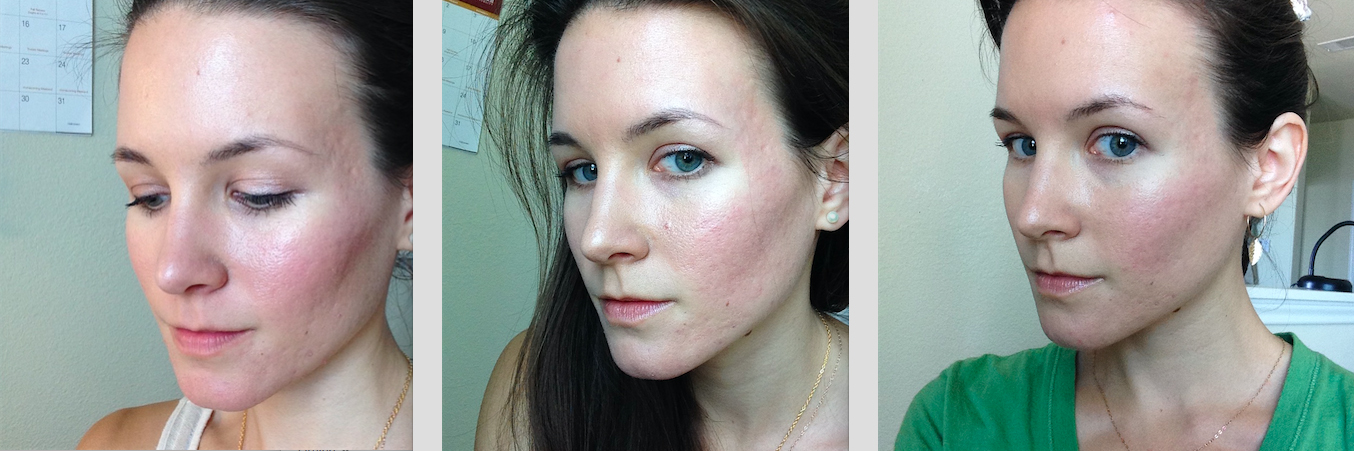
October 22 – December 7, 2015
For more information on derma roller treatments for acne scars, you may be interested in this study on combination treatment. Along with my favorite retinol treatment and vegan collagen supplements, I have by now faded my acne scars to a point where I don’t have to hide behind makeup.
Did I miss anything? Do you guys have questions or derma roller experiences to share? I’d love to hear!
More in skincare: Can Your Acne Be a Sign of Androgen Imbalance?
Should You Take Hormonal Balance Supplements? An Update
Get more like this—Subscribe to our daily inspirational newsletter for exclusive content!
This article was first published on December 8, 2015 and most recently updated on September 28, 2019.
Photos: Mary Hood Luttrell