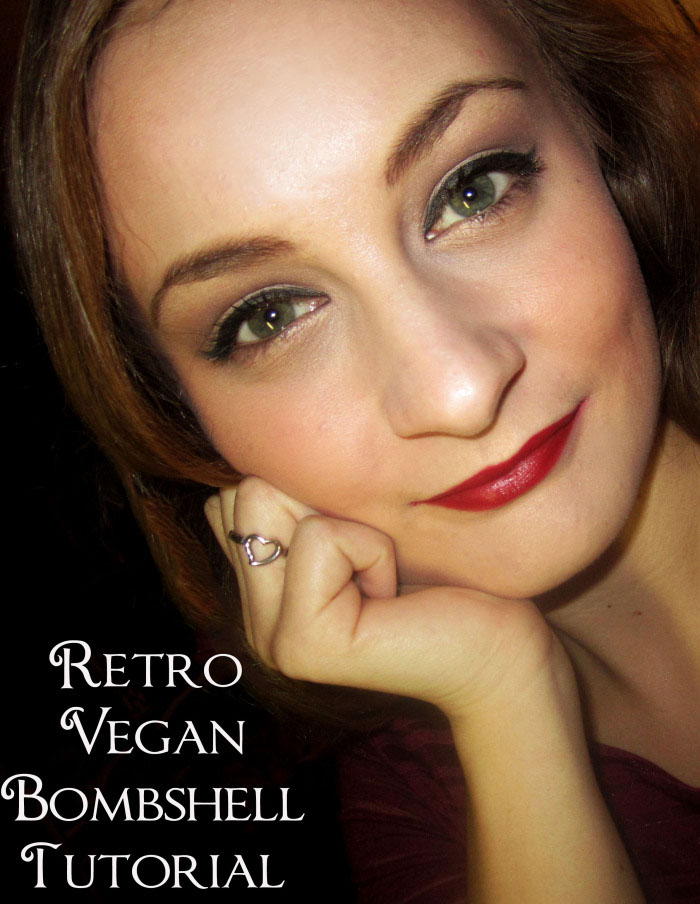
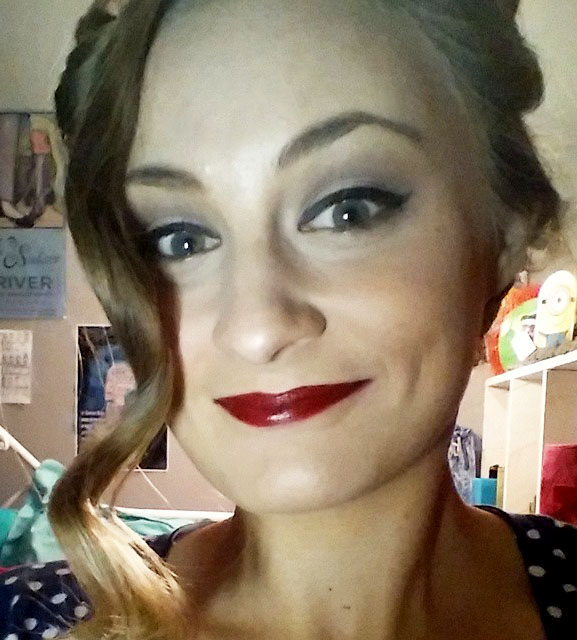
A retro and simple “bombshell” hair and makeup tutorial using cruelty free and vegan cosmetics!
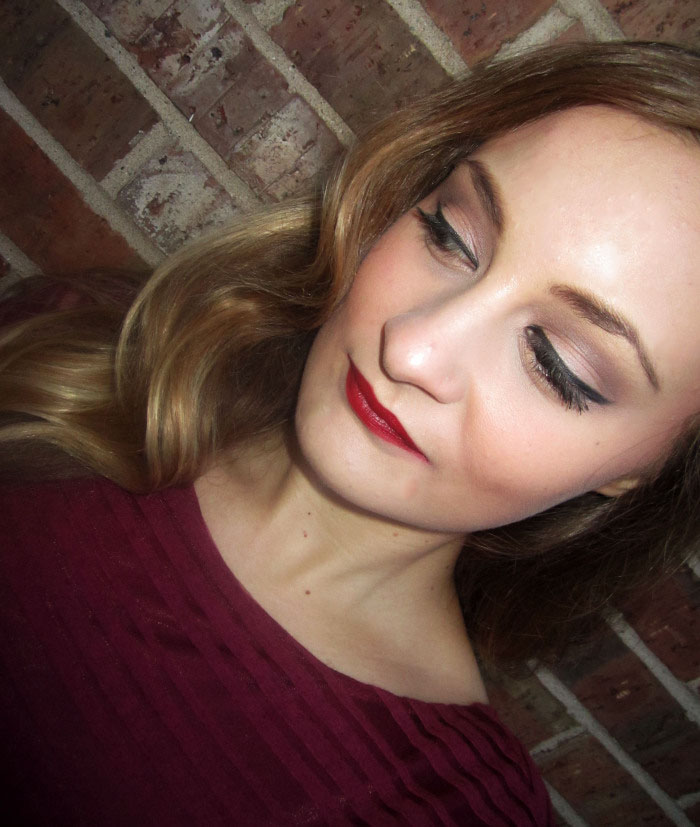
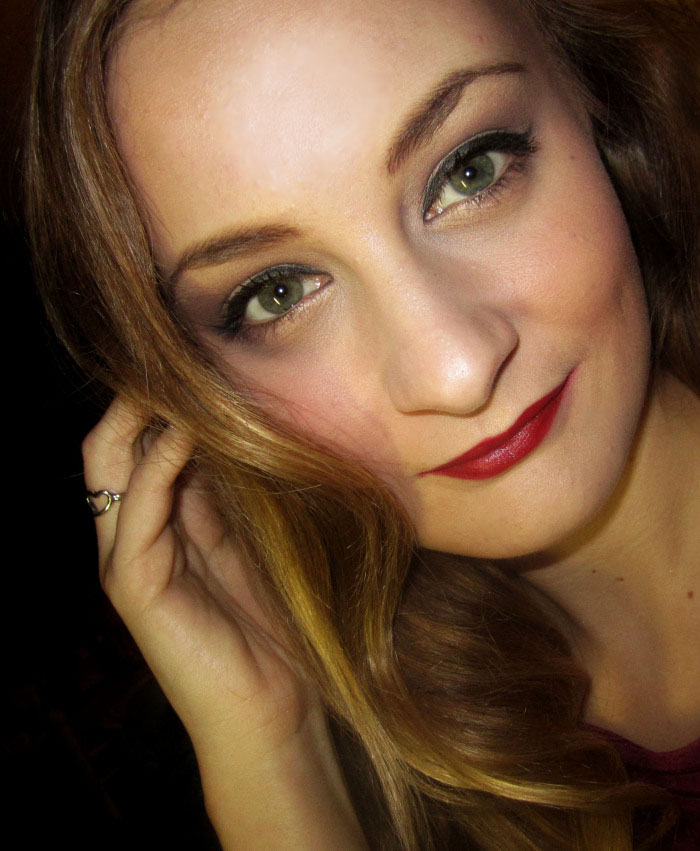
The glamorous bombshells of the Old Hollywood era have become beauty icons in our modern culture. (Who wouldn’t want to wake up looking like Rita Hayworth or Marilyn Monroe?!) If you are one of the many women who envy the seemingly effortless glamour of these iconic actresses, then this is the perfect hair and makeup tutorial for you! To achieve this classic beauty look, follow my simple hair and makeup guide below, and you’ll be a bombshell in no time!
Note: I recommend doing the pin curl portion of the hair tutorial prior to doing your makeup–it will ultimately save you styling time in the long run! Skip down to the hair section to see how!
MAKEUP:
Vegan Makeup Products Used:
All of the products used in this tutorial can be purchased at Target, Sephora, and Etsy!
Face:
Obsessive Compulsive Cosmetics Skin: Conceal Full Coverage Foundation (My specific shade is Y1).
Etherealle Mineral Contouring Powder in HOLLOW.
Etherealle Mineral Highlighting Powder in STARK.
Etherealle Mineral Blush in ROMANCE.
*Obsessive Compulsive Cosmetics products can be purchased online or in-store at Sephora. Etherealle products can be purchased through Etsy.
Eyes:
Pacifica Eye Brightening Shadow Palette in Enlighten: I used SKINNY DIP (the lightest tone in this palette; a champagne color) as my eyelid base color.
Pacifica Iridescent Palette in Gossamer Wings: I used GLOW (the lightest tone in the palette; a cream shade) as my highlight color for both my eyes and above my upper lip.
Pacifica Eye Brightening Shadow Palette in Enlighten: I used CORAL SAND (a coral/copper shade) as my first crease color.
Etherealle Matte Mineral Eye Shadow in SKYLARK (a matte medium brown-gray tone): I used this as my second crease color.
Obsessive Compulsive Cosmetics Cosmetic Colour Pencils in TARRED (Black) and SYBIL (Dark Brown)—I used these to further define my crease for my eye shadow, and I used TARRED to exaggerate my eyeliner. SYBIL was also used to darken and define my eyebrows.
Pacifica Smolder Eye Lining Gel in TAHITIAN PEARL (Black)
Too Faced Better Than Sex Mascara
*Pacifica products can be purchased online or in-store at Target. Too Faced products can be purchased online or in-store at Sephora and Ulta.
Lips:
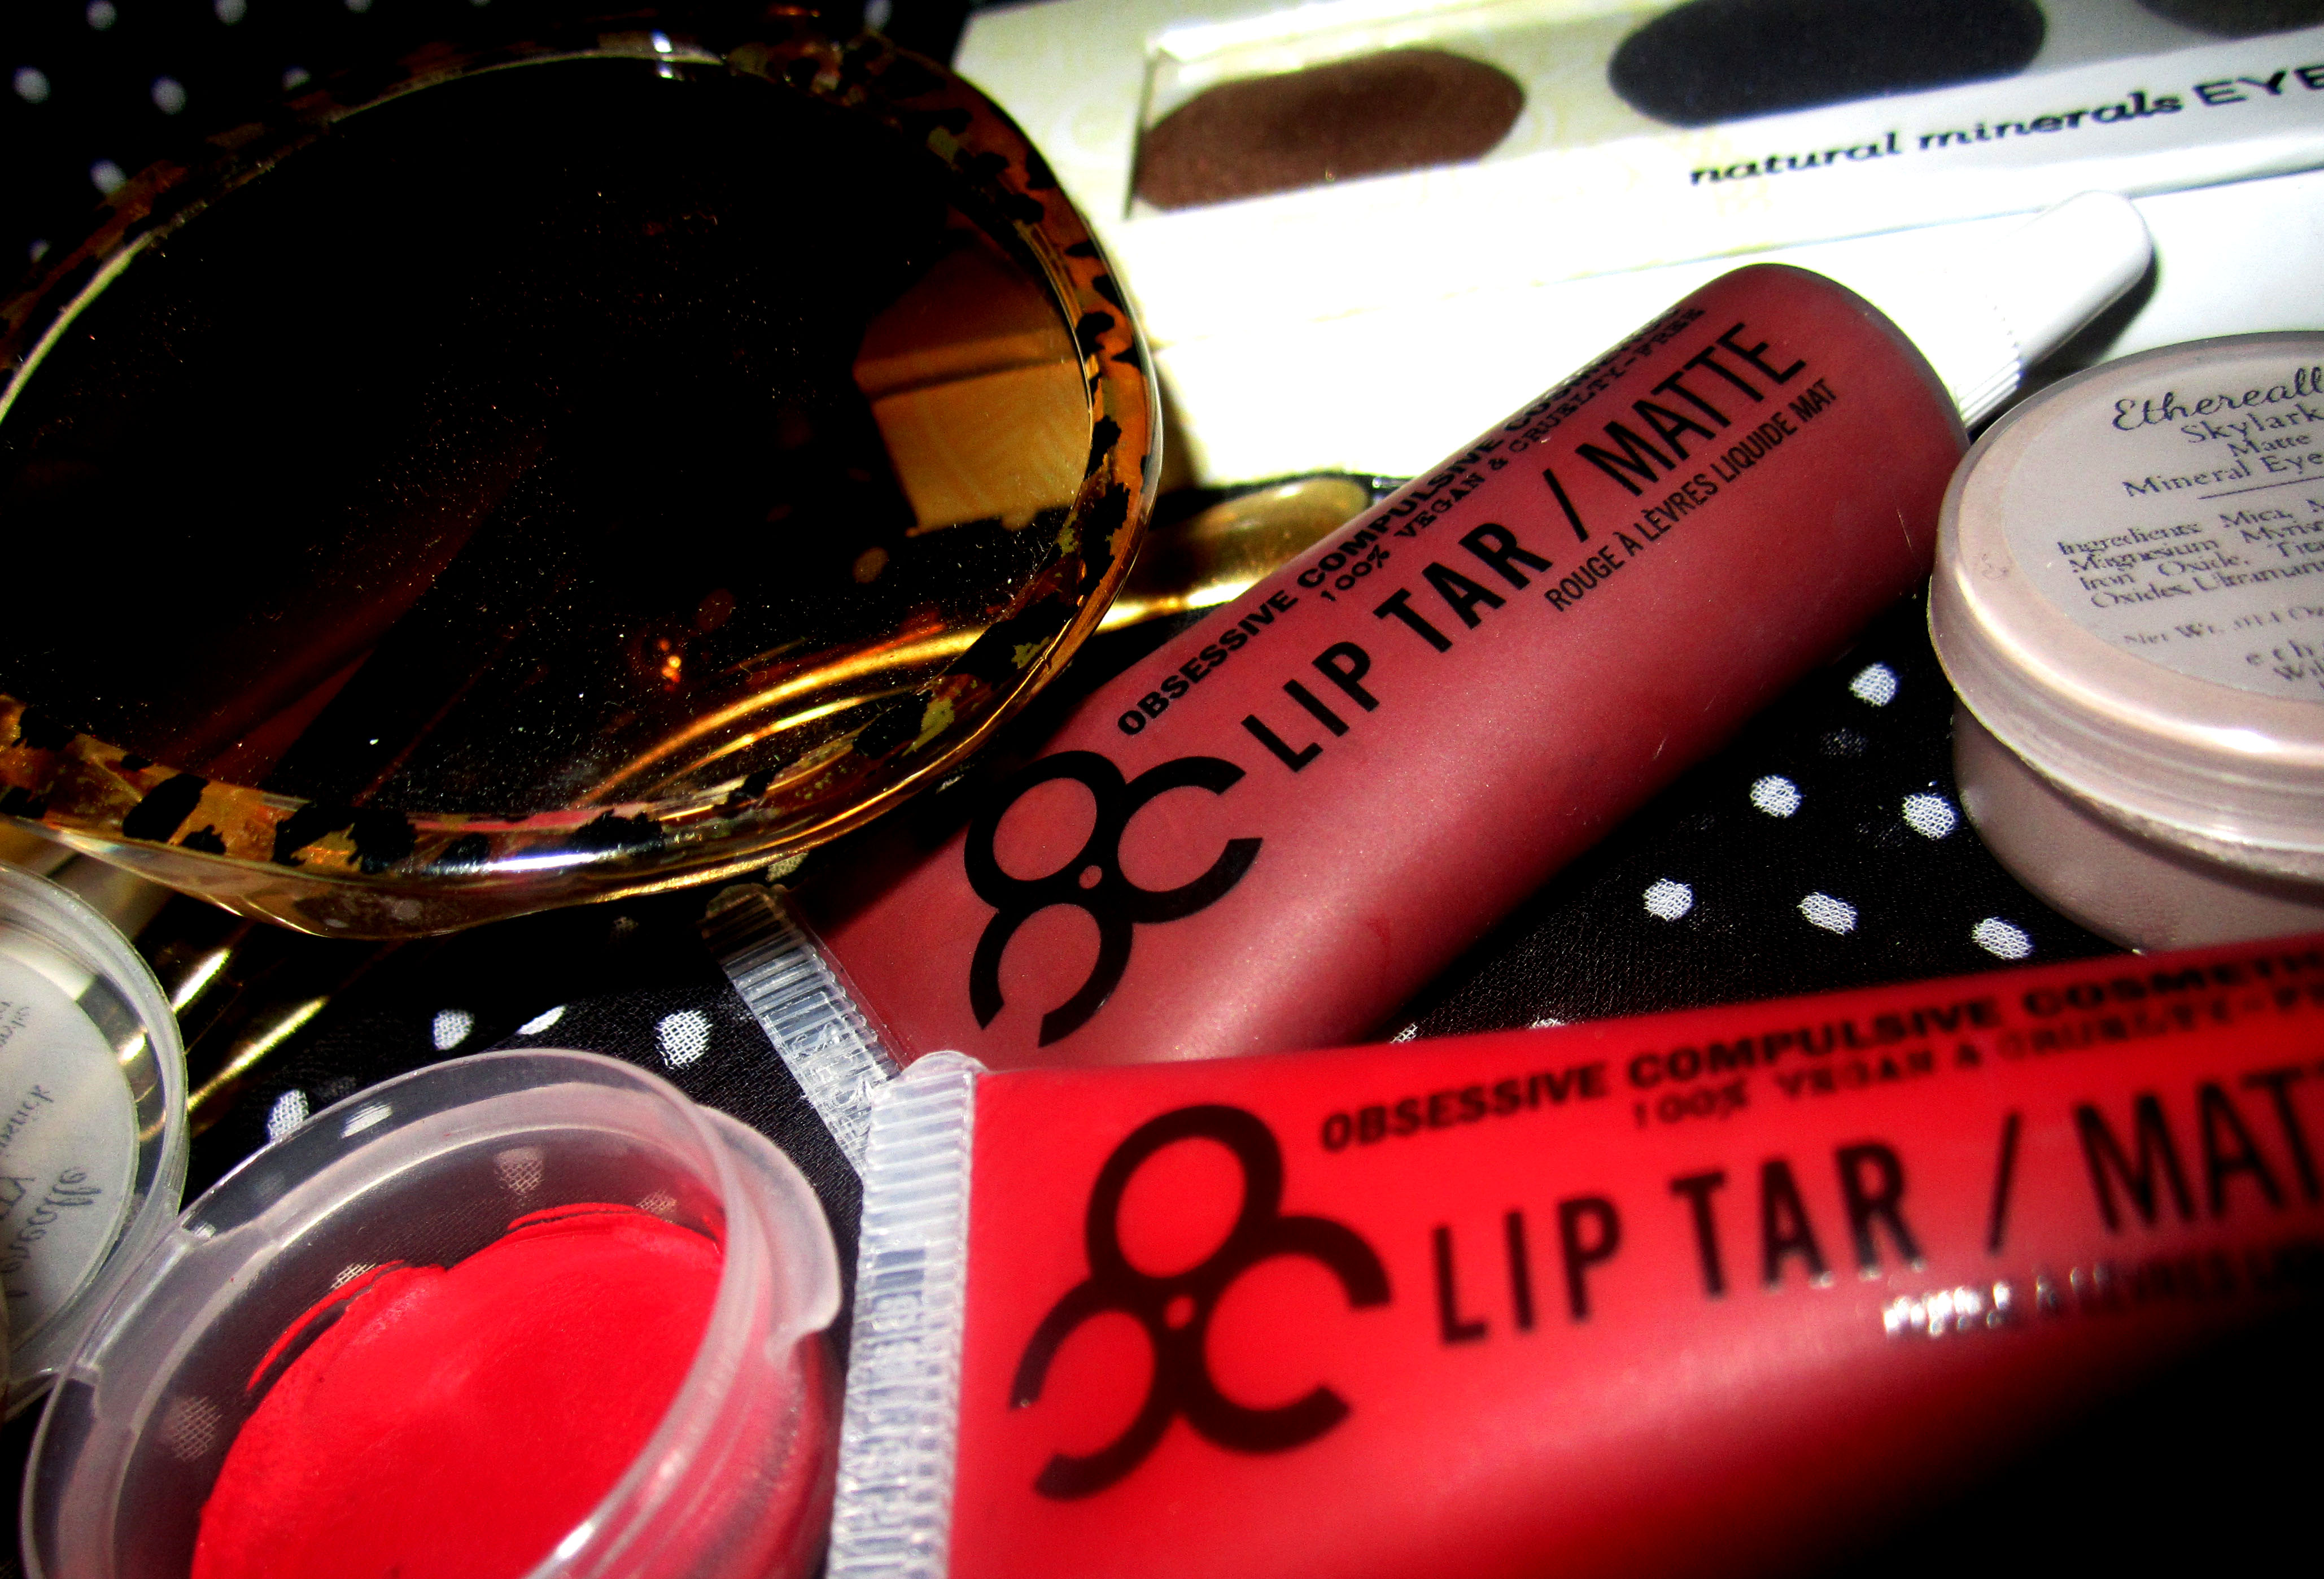
Etherealle Mineral Lipstick in CHERRY: I applied this as a base to my lips before applying the lip tars. I found that doing so made my overall lip color more vibrant and long-lasting!
Obsessive Compulsive Cosmetics Lip Tar Matte in NSFW & ANITA: I applied NSFW over Etherealle’s CHERRY, and once that dried, I applied ANITA to my lips to give them the dark, sultry red color.
Foundation:
1. Apply your foundation to your entire face, blending it onto your jawbone and slightly down onto your neck—I use my hands to apply my foundation, but feel free to use a foundation brush or whatever your favorite foundation application tool is.
2. If you are not using a full coverage foundation, such as the Obsessive Compulsive Cosmetics Skin: Conceal Full Coverage Foundation, apply concealer as needed before you apply your foundation. Apply concealer to any areas your foundation did not cover.
Eyes:
1. Apply SKINNY DIP from Pacifica’s Eye Brightening Shadow Palette in Enlighten to your eyelid. This will be your base color.
2. Apply GLOW from Pacifica’s Iridescent Palette in Gossamer Wings underneath the eyebrow and blend into SKINNY DIP.
3. Apply CORAL SAND from Pacifica’s Eye Brightening Shadow Palette to your crease and blend it down into SKINNY DIP and upwards into GLOW. Apply CORAL SAND to your crease only, not to the outer corners of your eyelid.
4. Next, apply Etherealle’s SKYLARK over CORAL SAND in your crease. Blend it down into SKINNY DIP and upwards into GLOW. By applying SKYLARK over CORAL SAND, you are adding extra definition, while still allowing a bit of the coppery tones of CORAL SAND to shine through. Do not apply it on the outer corners of your eyelid.
5. To intensify and further define your crease shading, apply the Obsessive Compulsive Cosmetics Cosmetic Colour Pencils in SYBIL and TARRED over SKYLARK and CORAL SAND. For the most successful application of SYBIL and TARRED, apply the pencils to a palette or the back of your hand, and then use an angled eyeliner brush (ECO Tools makes a nice one!) to apply the color to your crease. Apply SYBIL first and then lightly apply TARRED over that. Blend SYBIL into the other eye shadow colors before applying TARRED. Again, do not apply these to the outer corners of your eyelid. Blend strictly into the crease.
6. Next, apply the Pacifica Smolder Eye Lining Gel in TAHITIAN PEARL to your upper lashline only with an angled eyeliner brush. Apply the liner to the edge of the eyelid.
7. To create a cat-eye, draw the bottom line of the “wing” with the Obsessive Compulsive Cosmetics Colour Pencil in TARRED, curving upwards at the end of it. Then, draw the top line of the “wing,” connecting the original line of eyeliner across your upper lashline to the bottom line of the “wing.” Fill in the “wing” shape and darken the entire eyeliner line with TARRED. Voila! The perfect cat eye!
8. Curl your lashes and apply the Too Faced Better Than Sex mascara to your upper lashes and gently across your lower lashes. Let the first coat dry and apply 1-2 more coats, depending on how thick you would like your lashes.
9. If you have sparse, light eyebrows like I do, you can apply OCC’s SYBIL to darken and define your brows. First, apply SYBIL to a palette or the back of your hand and then apply to your brows with an eyeliner brush—this way you are not just drawing them on. This will give your brows a more natural, less cartoon-like effect. Apply the eyebrow color beginning in the middle of your eyebrow to the end of your brow and then use the remaining color to darken the front of your eyebrows.
Contouring & Blush:
1. Apply the Etherealle bronzer color (HOLLOW) to the cheekbones, temples, and your jawbone–blending downwards onto your neck and into your hairline. I use a fluffy angled brush to apply bronzer and contour my face.
2. Apply the Etherealle highlight color (STARK) to the cheeks, chin, forehead, nose, and underneath your eyes. Blend the highlight color into the bronzer. I suggest using a fluffy brush to achieve this part of the look.
3. Next, smile and apply the Etherealle blush color (ROMANCE) to your cheeks, blending it out towards your hairline.
4. Blend the blush and bronzer with the highlight color (STARK) using the same fluffy brush as before.
Lips:
1. First, apply the Etherealle Lipstick in CHERRY to your lips. This will be your base color and will help to create a more vibrant lip color with some serious staying power! I suggest using a brush to apply all lipsticks with. This will provide you with more even and precise coverage. I prefer using small concealer brushes to apply my lip colors.
2. Next, apply the Obsessive Compulsive Cosmetics Lip Tar Matte in NSFW.
3. Once that dries, apply the Obsessive Compulsive Cosmetics Lip Tar Matte in ANITA. Applying ANITA over NSFW and CHERRY will darken the shade to a deep, sultry red.
4. To further define and highlight your lips, apply more of Pacifica’s GLOW above your upper lip and onto the center of your lips. Highlighting these specific areas adds the illusion of fullness to your lips!
HAIR:
After years of bleaching, dyeing, and straightening my hair, I decided it was time to give it a break. In order to restore my hair’s health, I avoid heat styling my hair as much as possible. So what do you do when you still want luscious waves and curls, but don’t want to fry your hair to achieve this look? Pin curls!
Though the idea of pin curling your hair might seem a little daunting, it is actually quite simple! Follow these easy steps to achieve quick pin curls and effortless, glamorous waves that will amp up your bombshell style!
Pin Curl Waves:
Note: I prefer to pin curl my hair when it is slightly damp to amplify the curl and wave I can achieve. The wetter your hair is, the tighter the curl the will be (you will need to let it dry before finishing the style, however!) I pin curl my hair BEFORE beginning my make-up, in order to allow my pin curls sufficient drying time.
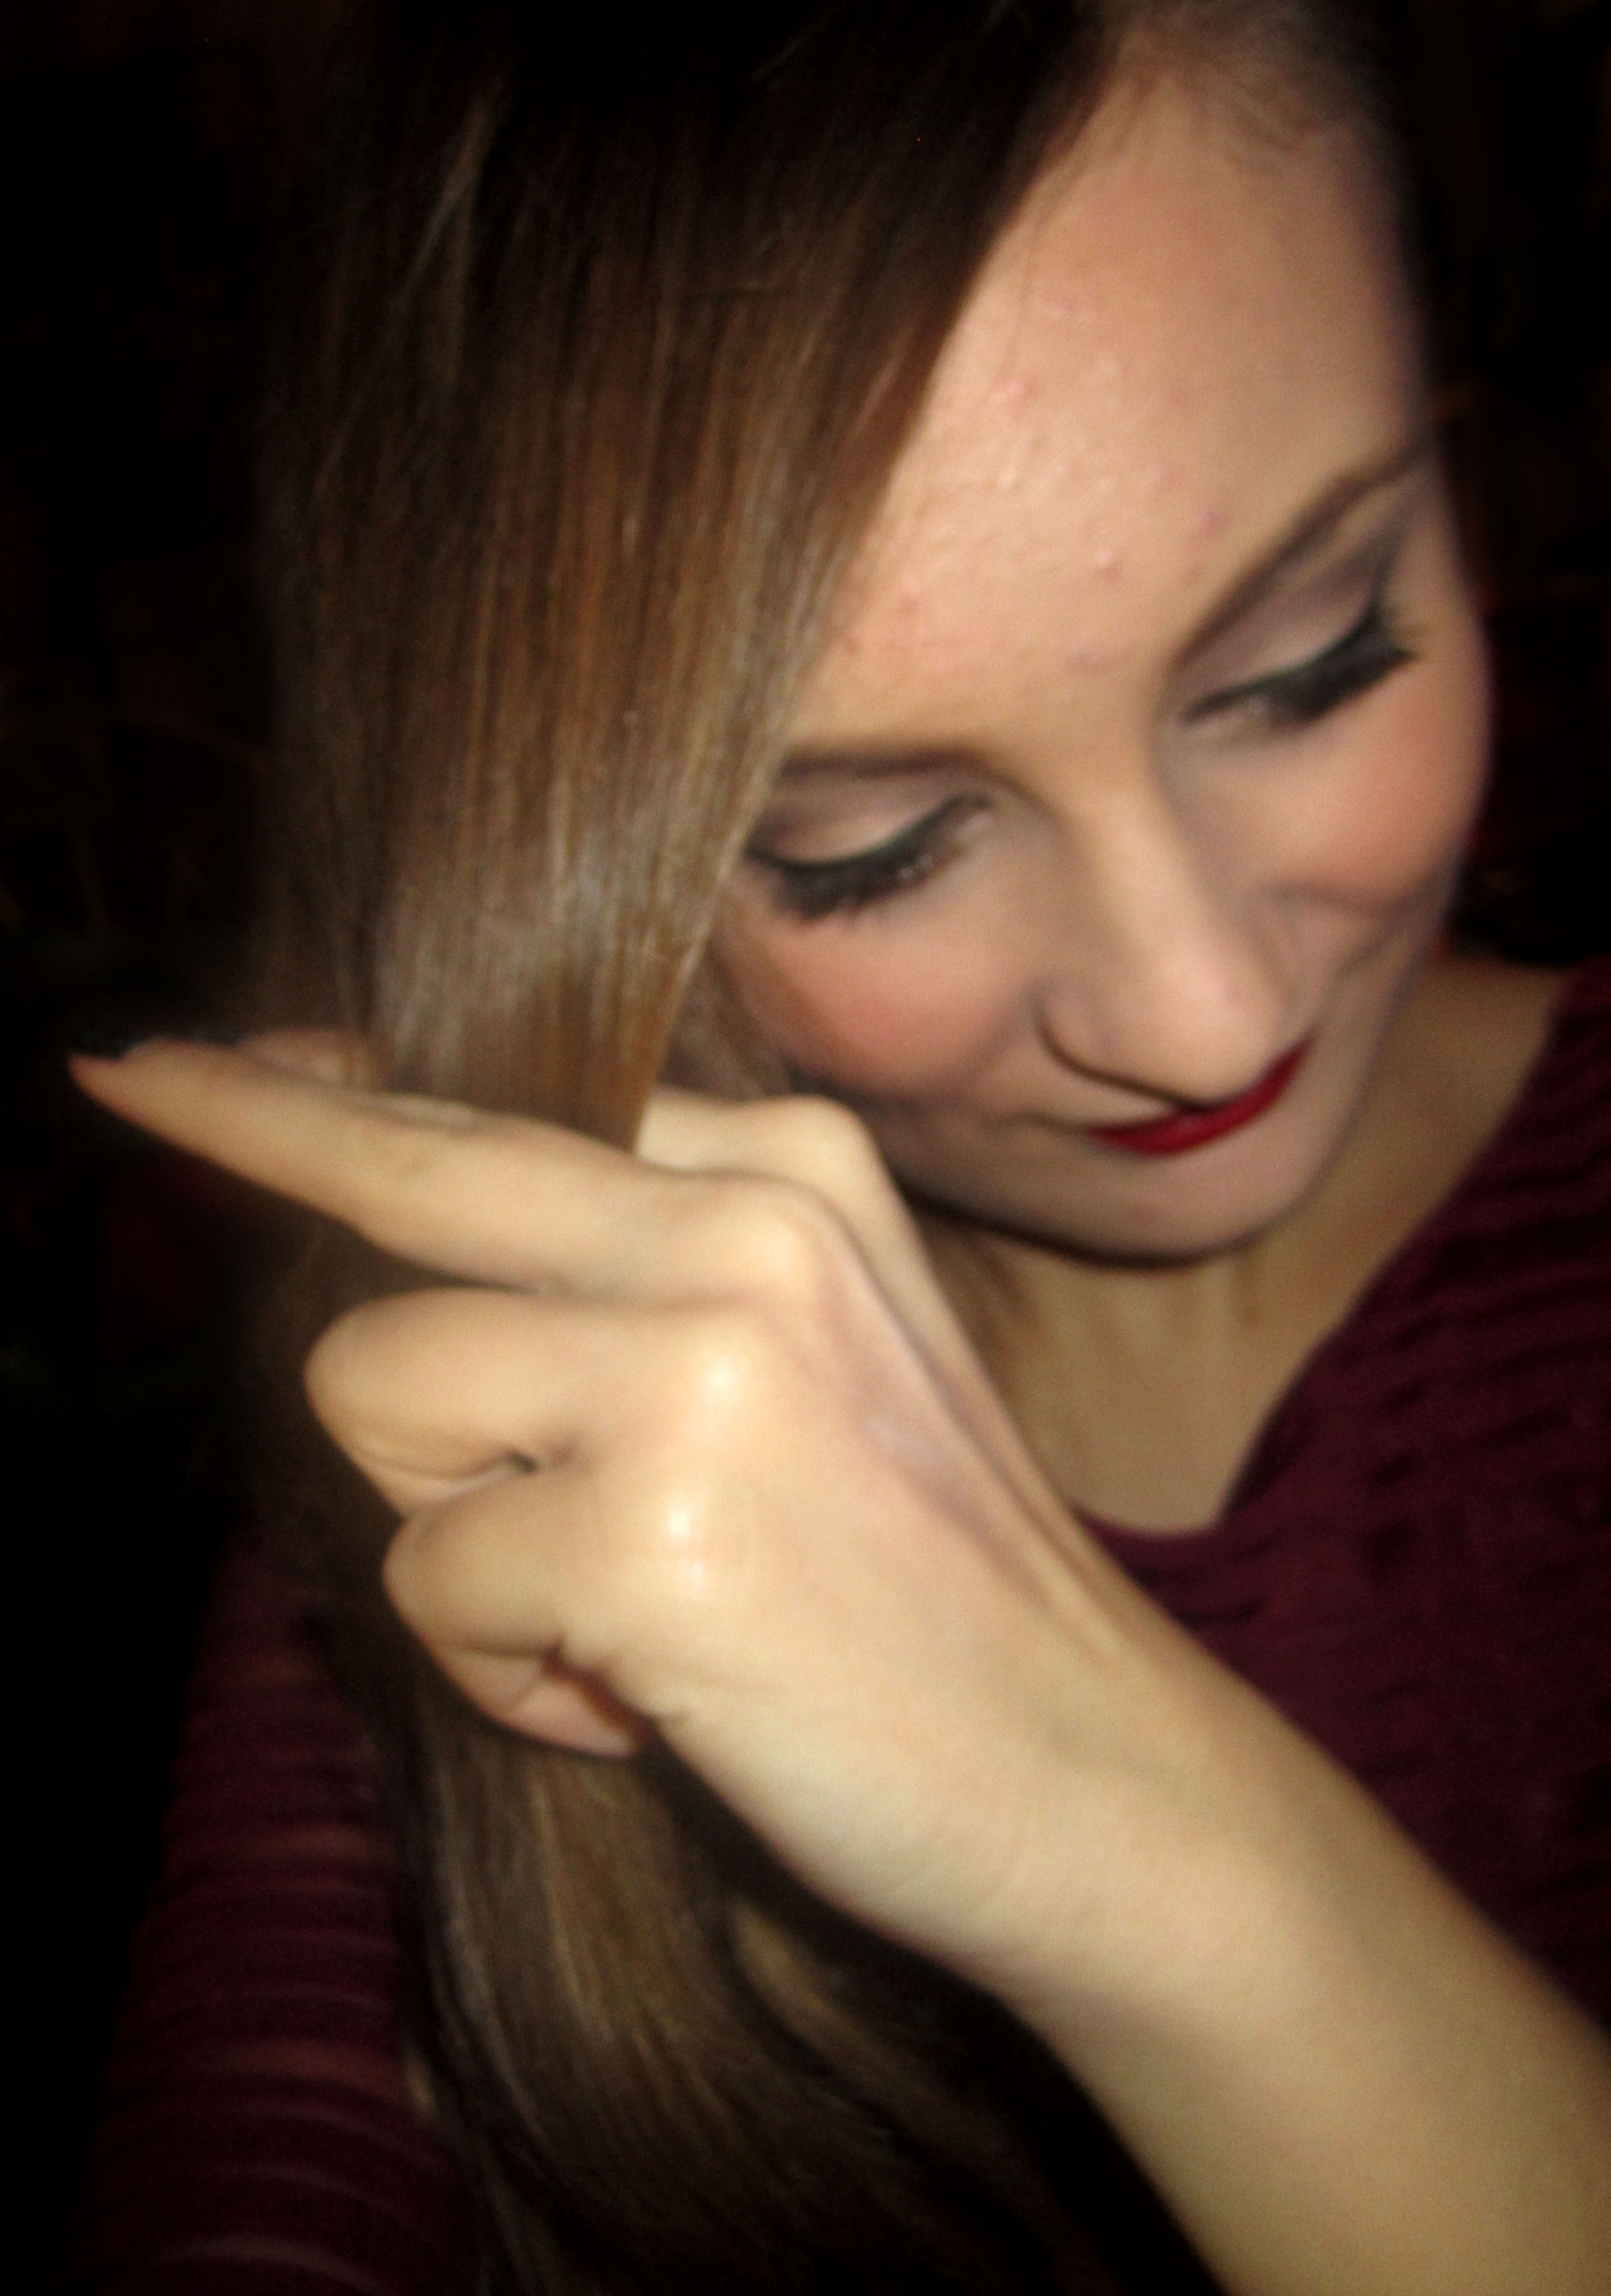
1. First, create a deep side part on whichever side you find to be the most flattering for you.
2. Next, select a section of hair from the side of your part that will act as your bangs. The size of the section will determine the size of the curl, and therefore the size of the wave you will achieve as well. The smaller the section, the tighter the curl and the smaller the wave. The larger the section, the looser the curl and the bigger the wave.
3. Place your index finger and middle finger at the base of the section, and wrap the section of hair around them.
4. Then, slide the section of hair off of your fingers, and tighten the curl by rolling it in on itself and closer to your scalp. The direction you roll the curl in will become the direction of the wave. Your bangs should be curled down and towards your face, while the rest of your hair should be curled up and away from your face.
5. The hair should be rolled to your scalp in a circular shape–this shape will create the curl (and therefore, the wave). Once you have the section of hair rolled to your scalp, secure it with two bobby pins, in a X-shape.
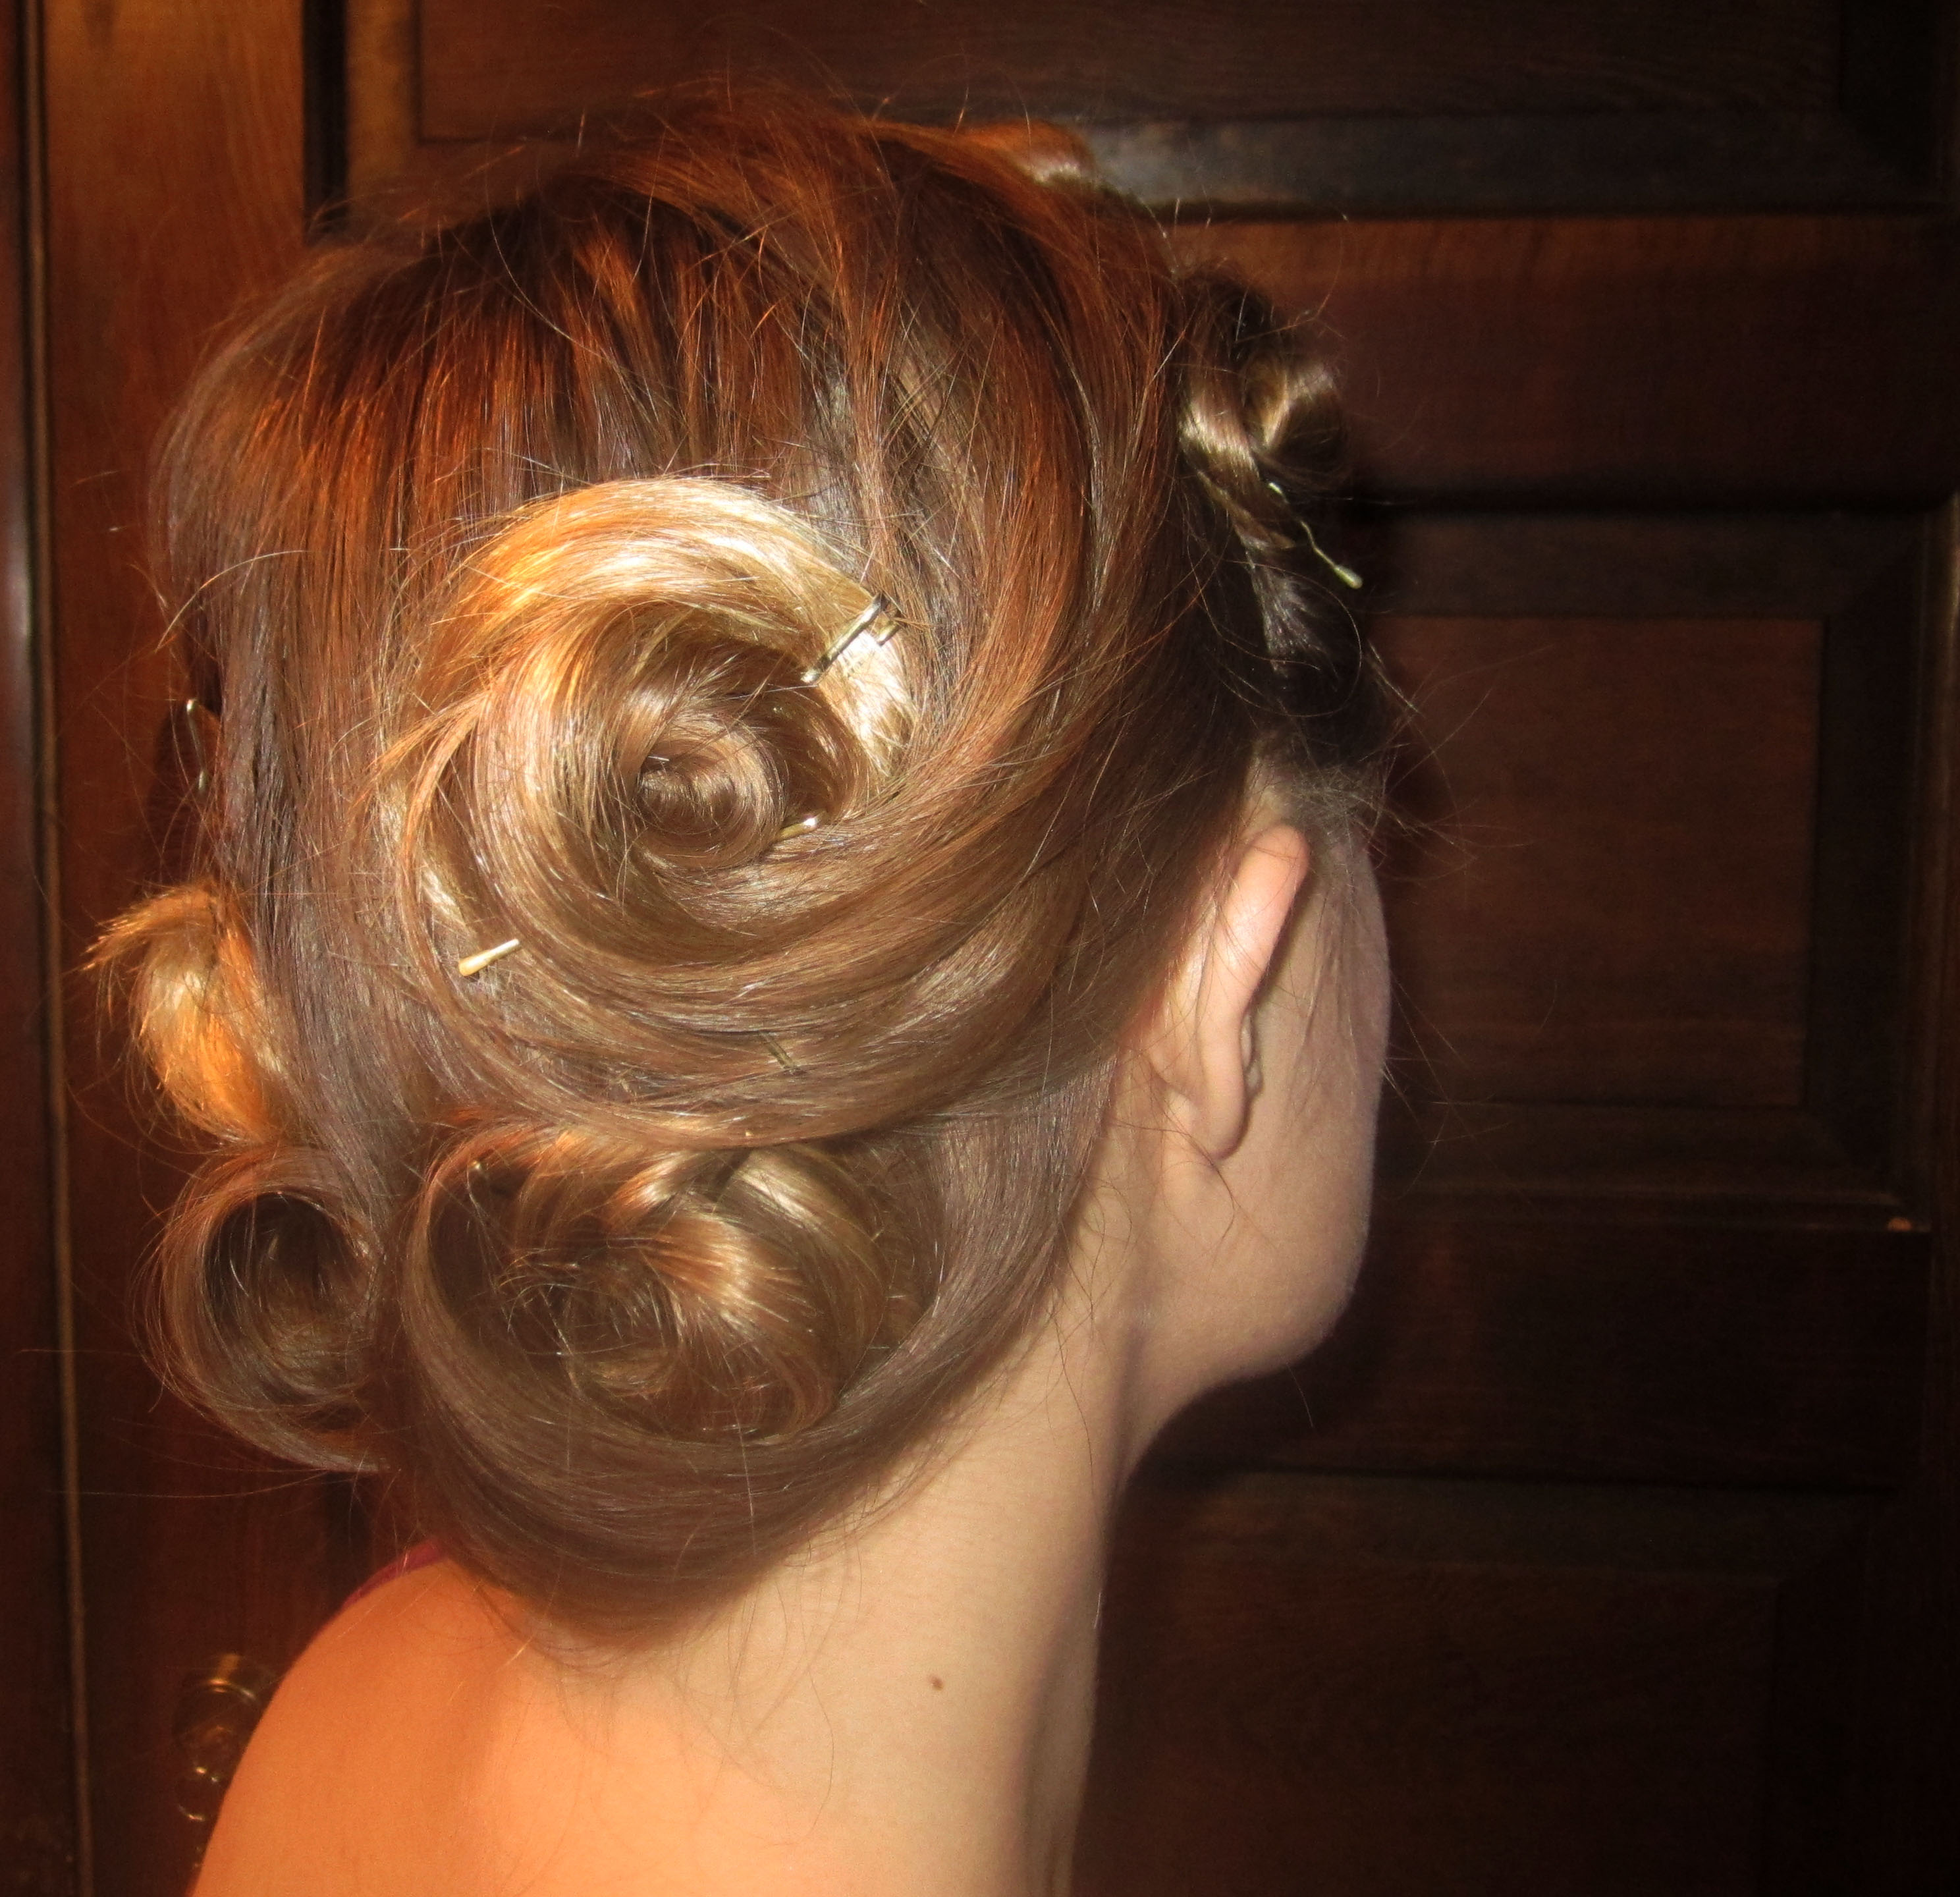
A side view of the pin curls.
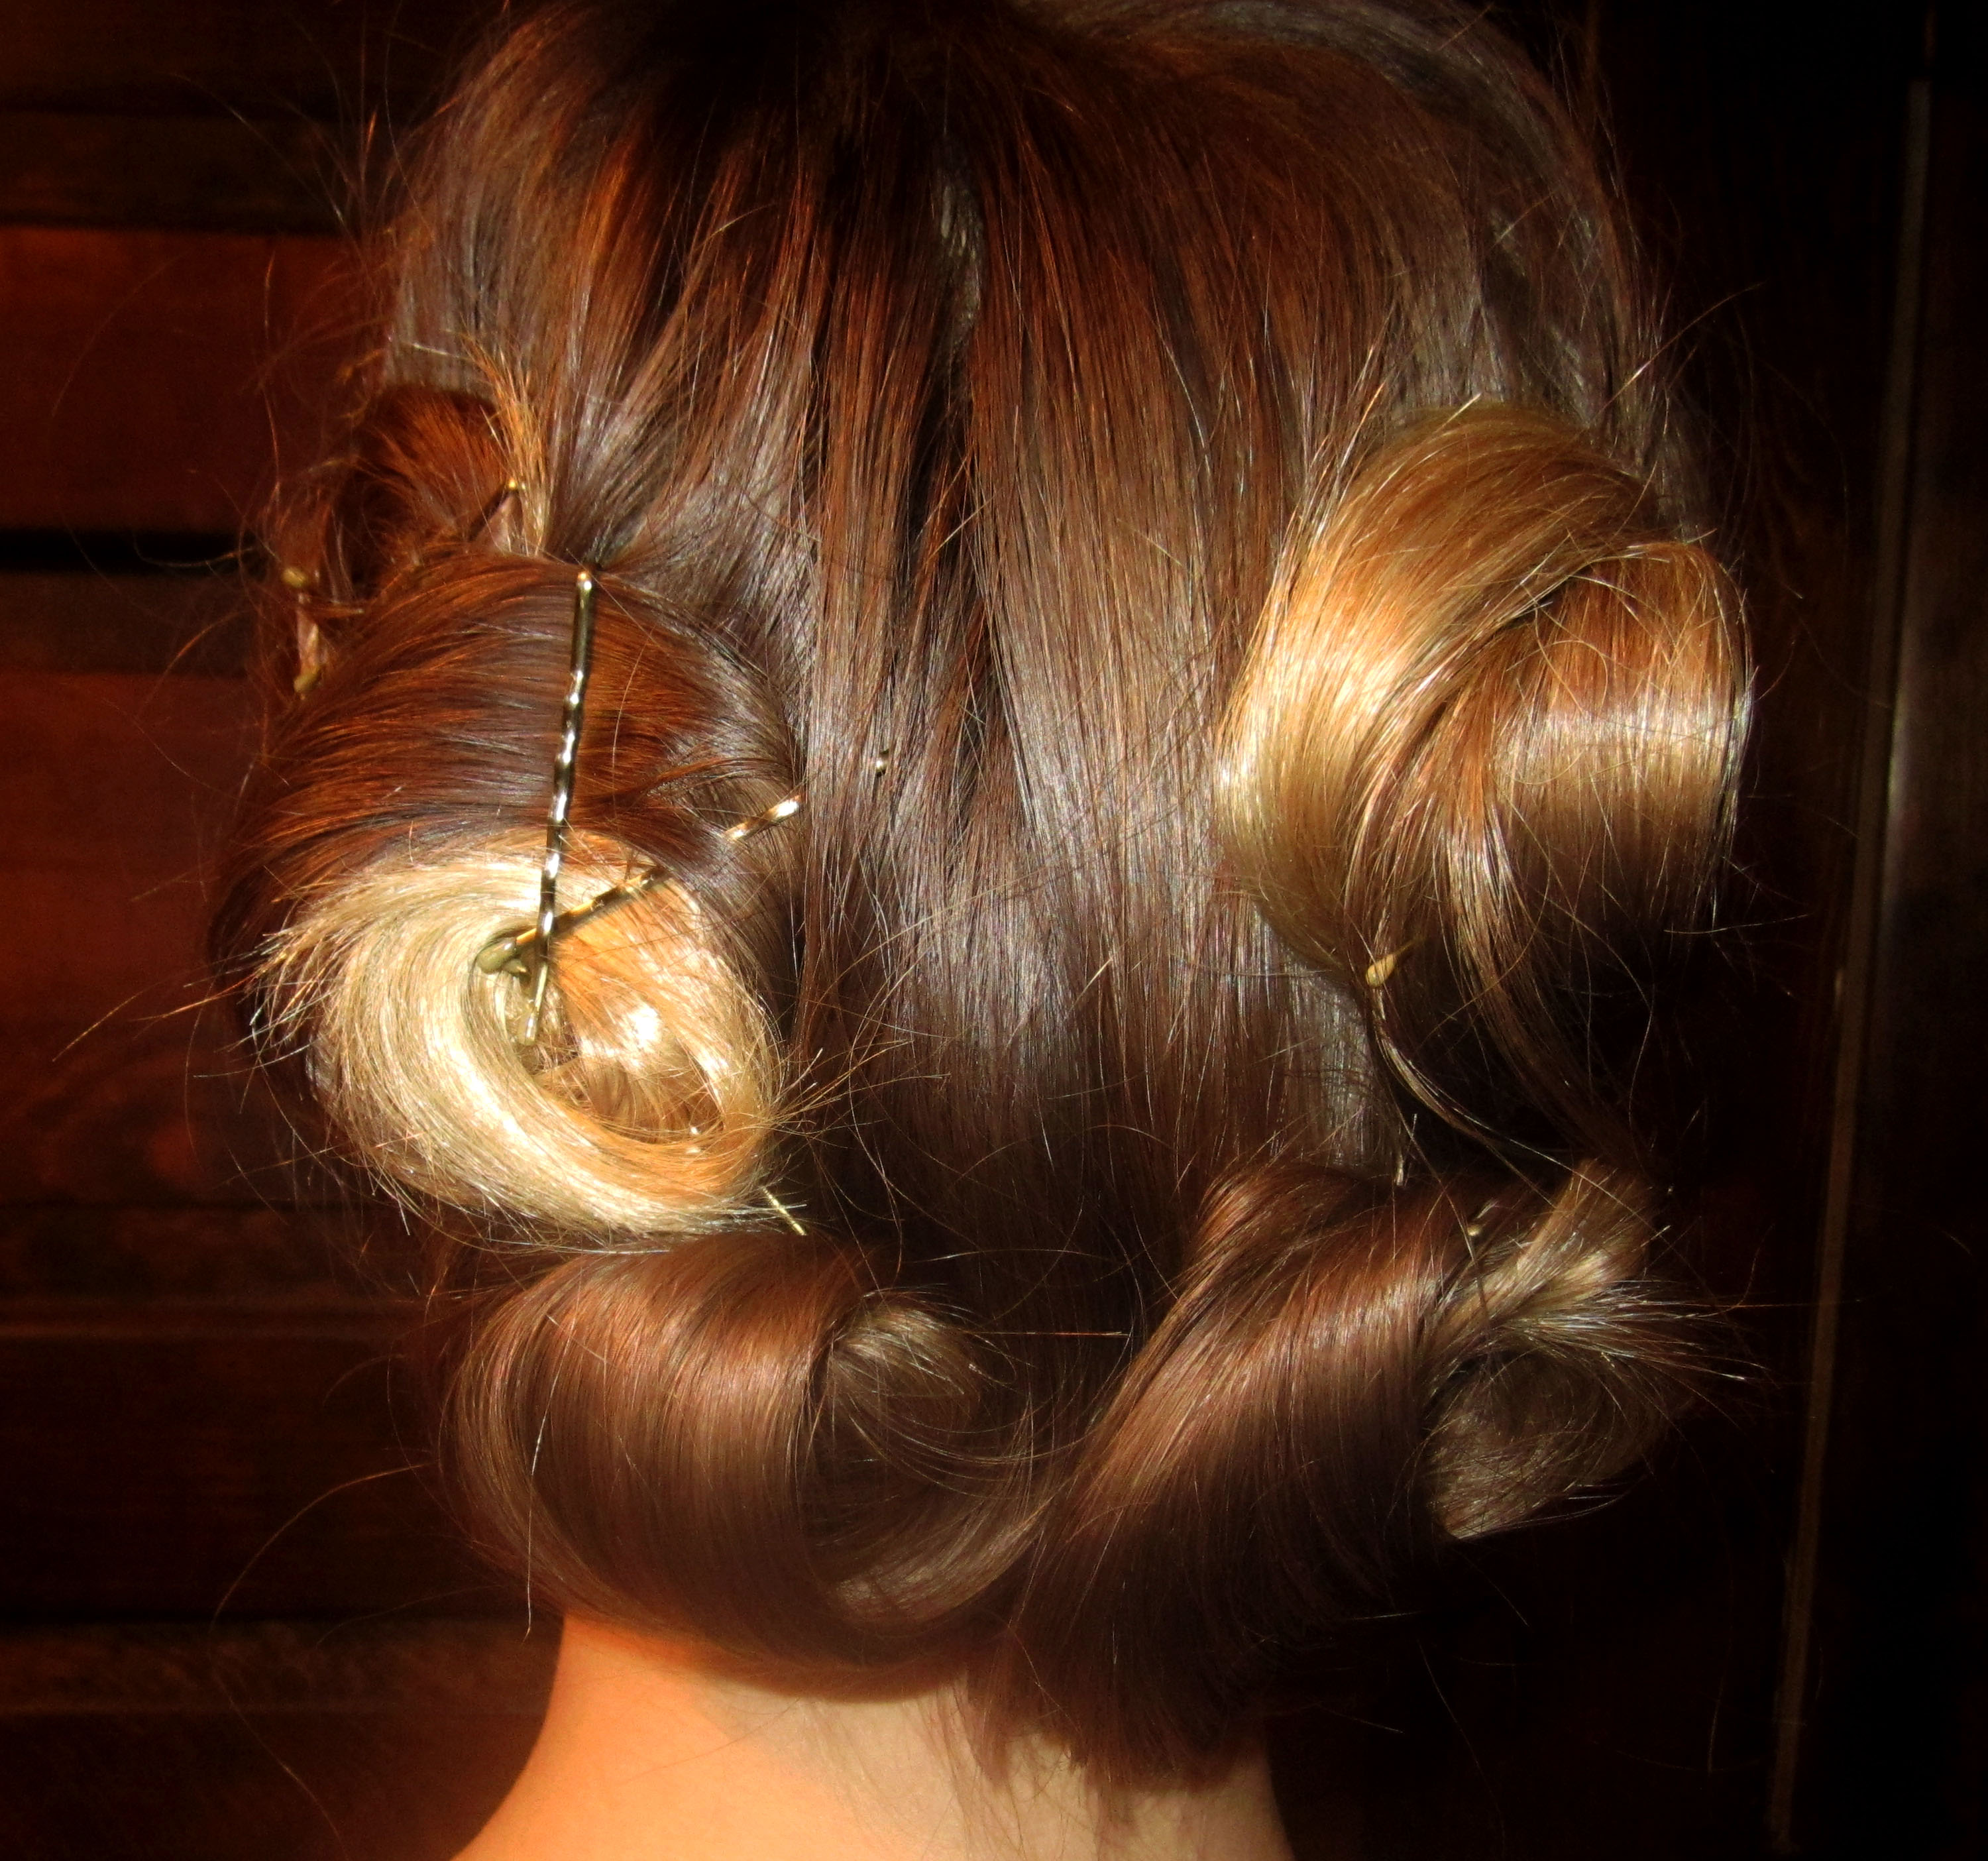
A back view of the pin curls.
6. Continue pin curling your bangs in smaller sections downwards, towards your face. Once you finish your bangs, begin rolling larger sections of hair up, and away from your face. You want the most definition in your bangs in order to frame your face, so that is why those sections are slightly smaller than the rest of the pin curls (this also saves time!). Pin curl from your bangs to the middle of the back of your head.
7. Once you have that half of your head pin curled, begin pin curling on the other side of your head, moving from the front of your head to the back. Again, these pin curls can be a little larger than the ones in your bangs. As long as you do these up and away from your face, you will achieve the glamorous waves you’ve been dreaming of!
8. Allow your pin curls to dry (generally, the time it takes you to complete your make-up and get dressed should be plenty of time!).
9. Once they are dry, remove the bobby pins, and using a WIDE TOOTH COMB, gently comb through your pin curls. This will loosen the curl without removing the wave entirely.
10. To add volume to your hair, use a teasing comb on the hair at your roots, and then gently smooth the hair back down to cover the teased pieces. I found that I only needed to do this on the side opposite my bangs to help balance the deep side part. I placed this side of my hair behind my shoulder to further emphasize the dramatic waves in my bangs.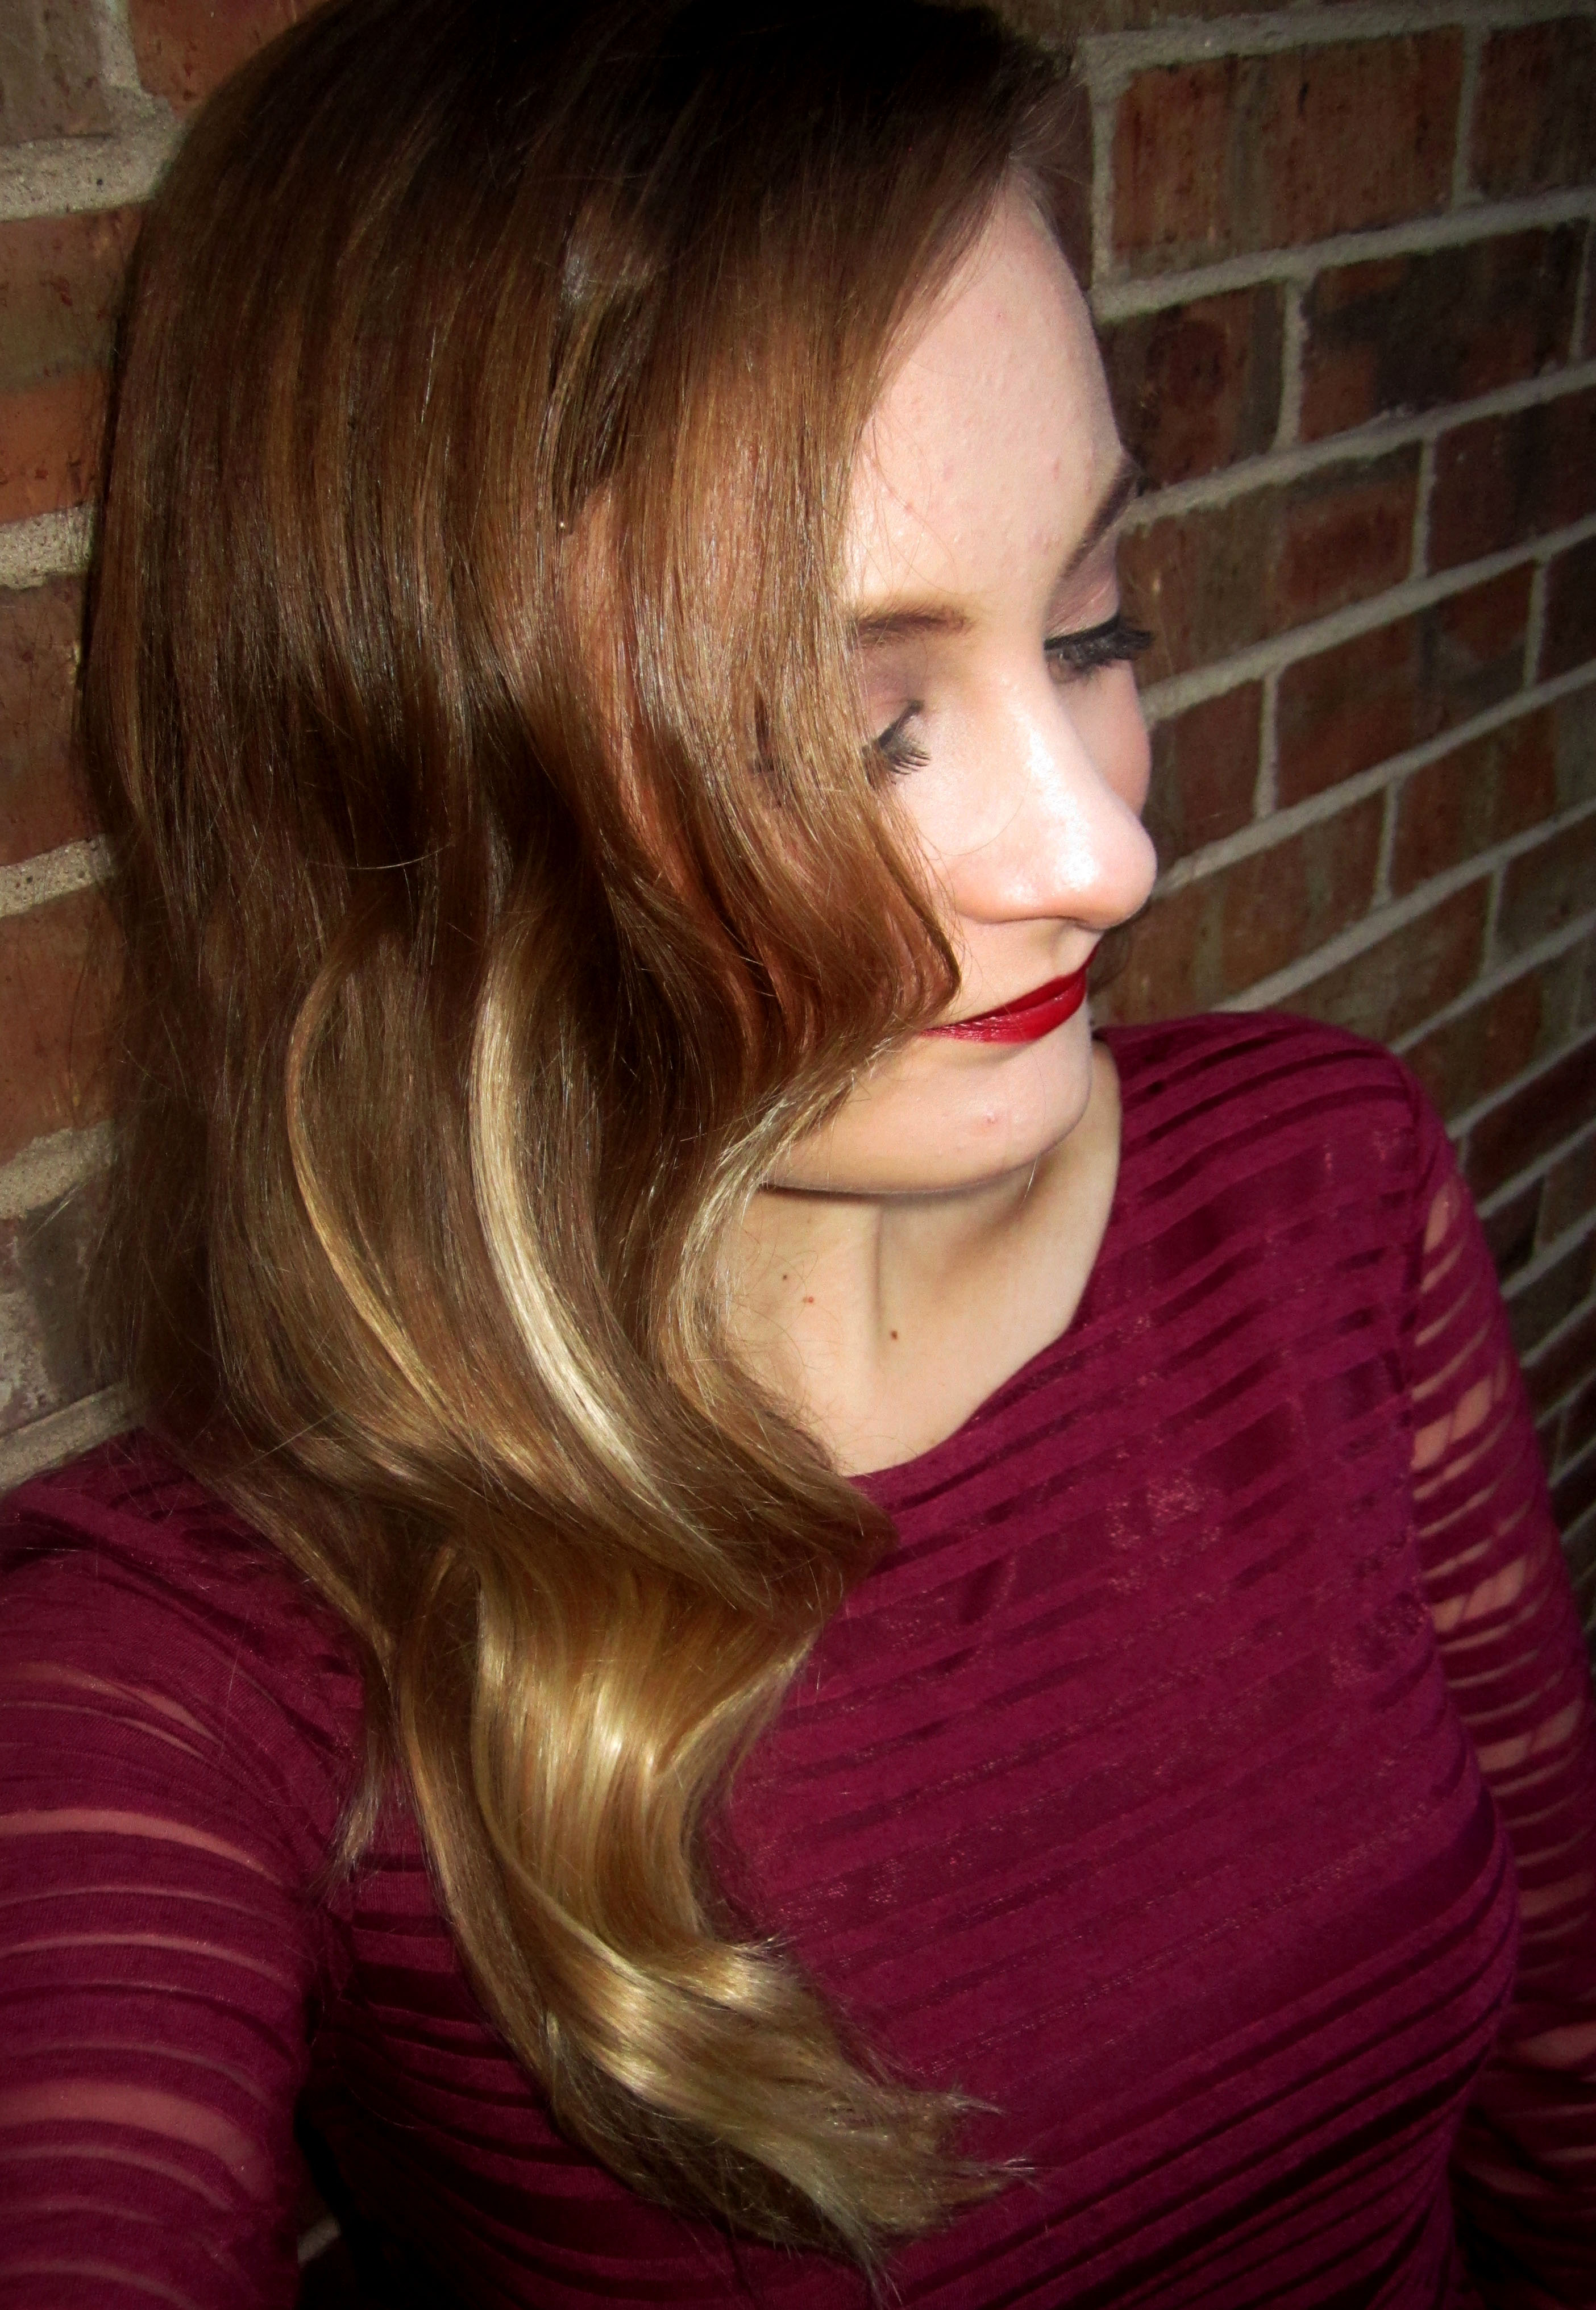
11. To prevent your hair from falling into your face, you can place a bobby pin underneath your bangs to secure the hair in place without losing the overall look!
12. Spray a little hairspray over your waves to help them hold their style, and your Rita Hayworth-inspired bombshell waves are complete!
Voila! Bombshell status achieved.
Also by Becky: Vegan and Cruelty Free Dupes for Allure’s Best of 2014
_
Photo: Becky Curl


