It’s a total oxymoron to rush through your restorative yoga practice—after all, if your mind is preoccupied with how much time you have left in the pose or all the things you need to do after your practice, your nervous system hardly has a chance to settle down.
But with all the activity and excitement of summer upon us (hiking! travel! weddings! exhaustion), a relatively short, 30-minute restorative practice allows you to fit all the benefits of restorative yoga into your busy summer schedule. All you need to cool down, chill out, and rejuvenate a tired body and mind is half an hour, a few props, and a willingness to breathe.
So gather up your blocks, bolsters, and blankets (don’t worry, I’ve included suggestions for makeshift props below), and give yourself 7 minutes of total surrender in each of these 4 restorative poses.
1. Elevated Heart Opener
Why it’s so yummy:
Beginning your restorative practice in a slightly elevated position helps you ease into the relaxation, like slowly lowering yourself into a warm bath. It’s hard to go from 60 to 0 right away—starting with this pose encourages a gradual softening and opening of the heart space. Your back and knees are fully supported in a gentle backbend, so all you need to do is lay back and breathe.
You’ll need:
— 2 yoga blocks (or several thick, hard-cover books)
— a bolster (a firm body pillow or couch cushion also works)
— 3-4 blankets (yoga blankets are awesome, but regular ones are fine, too—just make sure at least 2 of them are the same shape and size)
How to get into it:
If you’re using blocks, place one on its medium value and another on its lowest value directly below it. If you’re using books, create two stacks—a higher one and a lower one—to simulate the blocks. Lay a bolster, body pillow, or couch cushion on top of the blocks or books to form a slightly elevated ramp, making sure it’s sturdy and secure.
Fold 2 blankets of the same shape and size (here’s how to fold a yoga blanket), and place them diagonally on either side of your mat. These will support your elbows and lower arms. (It’s important that the blankets are folded the same so there’s no asymmetry in the pose, which can be distracting.) Roll up a third blanket to support your knees.
Sit with your butt at the bottom edge of the ramp, place the rolled blanket under your knees, and slowly lower yourself onto the bolster. Set a timer for 7 minutes. Let your arms rest comfortably on the folded blankets, close your eyes, and bring your awareness to your breath.
When the timer is up, carefully roll yourself off the bolster, take a few full breaths on your side, then use your top arm to gently push yourself up.
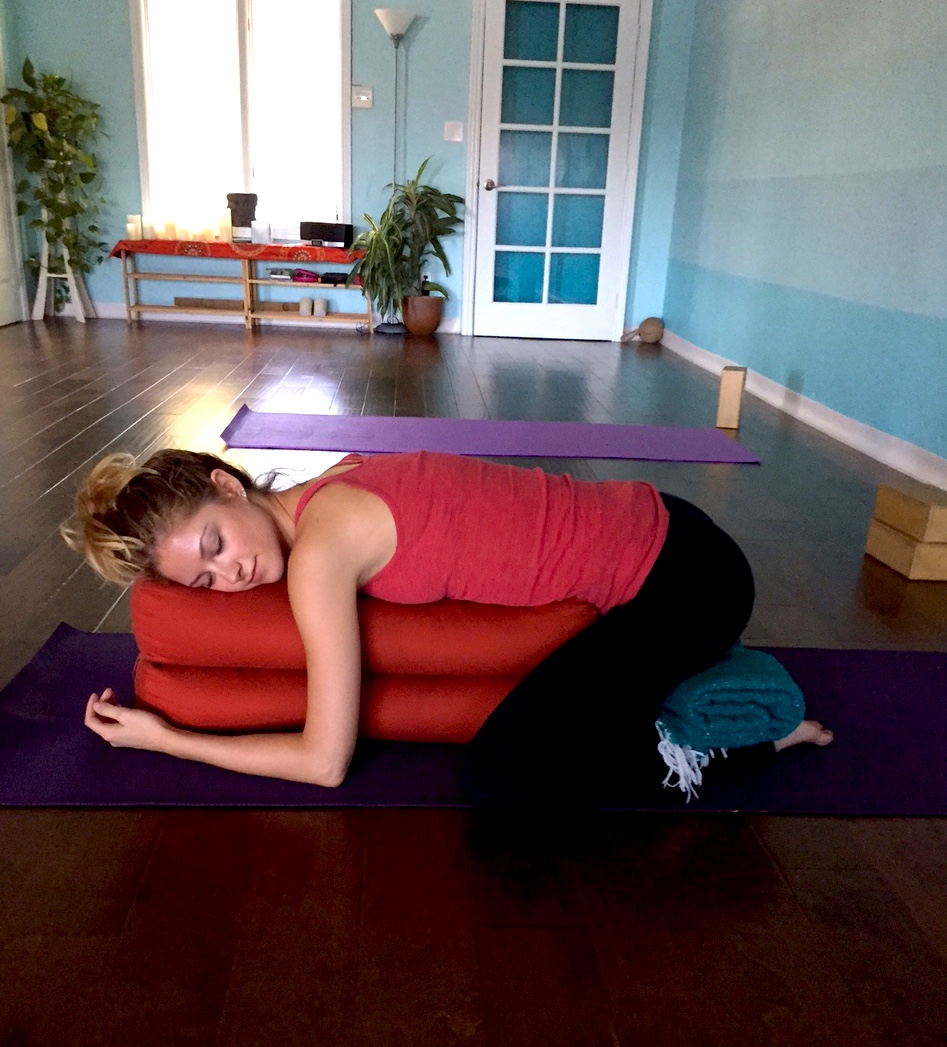
2. Supported Child’s Pose (Salamba Balasana)
Why it’s so yummy:
Now that you’ve opened up the heart space with a gentle supported backbend, it’s time to turn over and curl up in total comfort. Supported Child’s Pose is about as close to the comfort of the womb as you can get in adulthood! (I turn to this one when I’m dealing with sadness for exactly that reason.) The props fully support your body in a restful fetal-like position, encouraging the senses to turn inward and tense muscles to relax and release.
You’ll need:
— 2 bolsters (or a couch cushion, or a body pillow folded in half)
— 1 blanket, folded
How to get into it:
Stack the bolsters, couch cushion(s), or body pillow vertically on your mat. Kneel in front of the props with your knees wide, sit back onto your heels, and tuck the props in between your legs. Lift your hips and place the folded blanket between your hips and heels (elevating your hips will help reduce any pressure in your lower back).
Set a timer for 7 minutes, fold forward, and rest your torso on the bolsters. Turn your head to one side, and allow your arms to relax on either side of the bolsters. Close your eyes and let yourself melt into the support beneath you with each breath. After several breaths, turn your head to face the other way.
When the timer is up, place your hands on the ground and slowly lift yourself away from the bolsters. Maintain this relaxed state of mind and body as you set yourself up for the next pose.
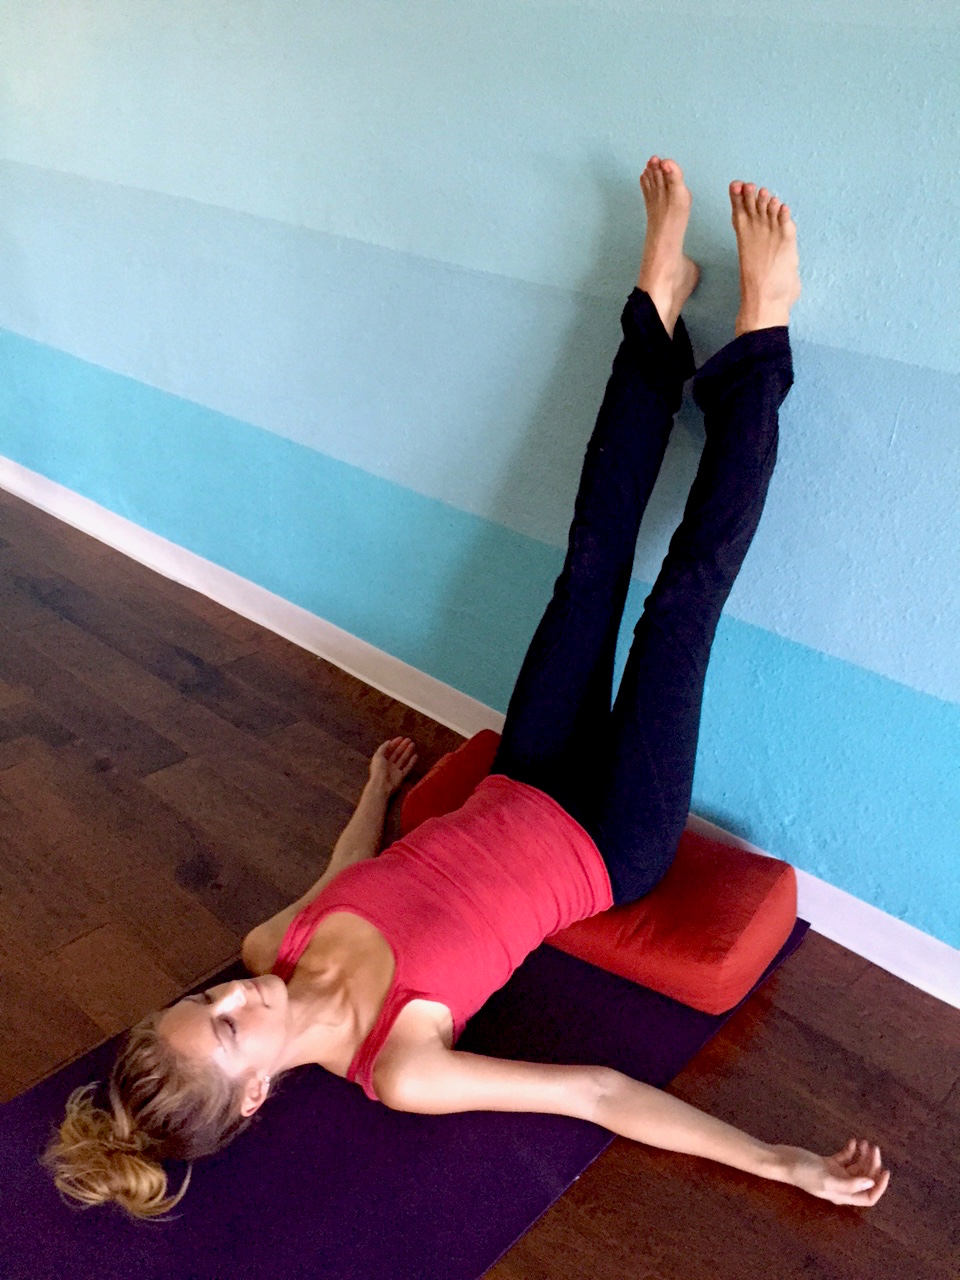
3. Legs Up the Wall Pose (Viparita Karani)
Why it’s so yummy:
Legs Up the Wall pose is a miracle worker when it comes to relieving tired legs, lower back pain, and general stress or anxiety. Sliding a bolster under your hips raises them just slightly above your heart, creating a gentle inversion that encourages blood flow to the upper body and head. You may notice a refreshing sense of clarity and calm after resting in this pose as a result.
You’ll need:
— wall space
— a bolster or couch cushion
How to get into it:
Sit with your left hip next to the wall. As you start to recline, lean your weight onto your right elbow and swing your legs up to bring your heels to the wall. Find a comfortable position on your back with a few inches between your hips and the wall. Carefully lift your hips and slide the bolster underneath.
Set a timer for 7 minutes, and rest your arms comfortably by your sides. Close your eyes and let your leg bones completely relax into the weight of gravity.
When the timer is up, slowly bring your knees into your chest, roll to one side, and use your top arm to gently push yourself up.
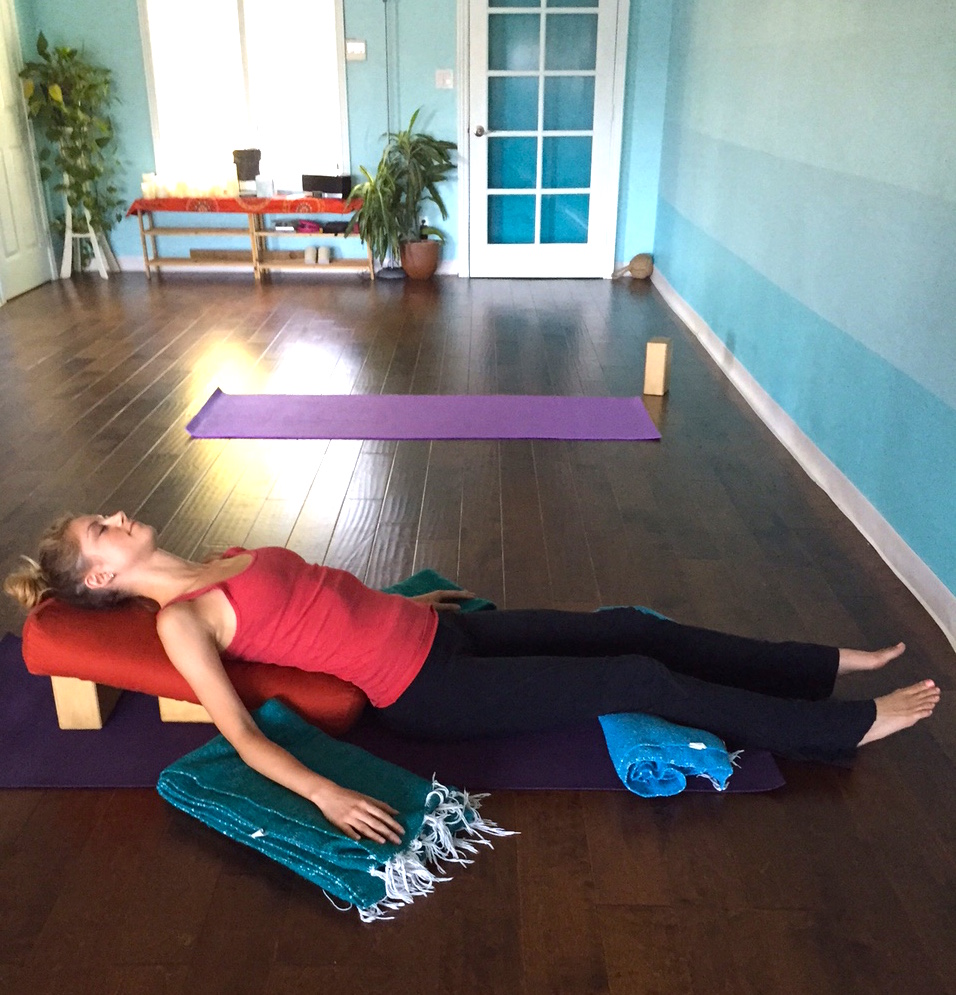
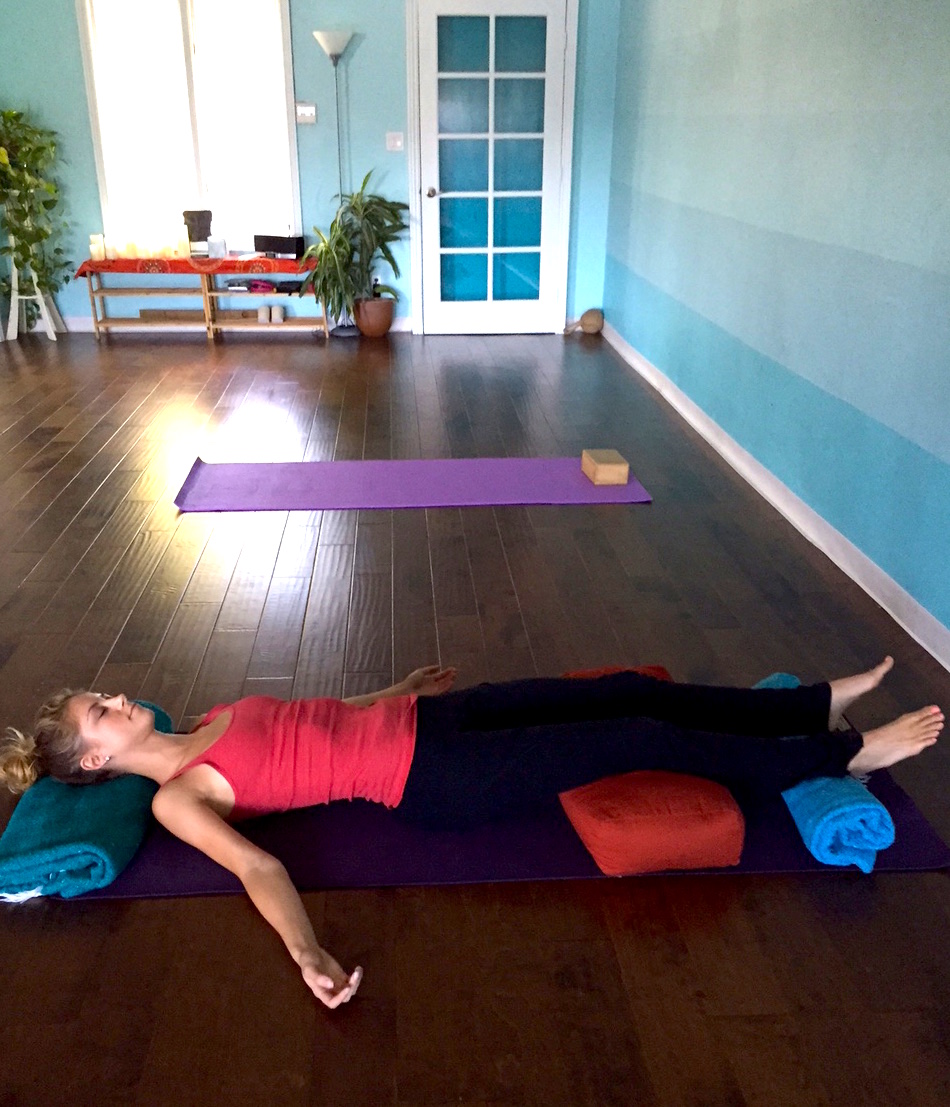
4. Supported Corpse Pose (Salamba Savasana)
Why it’s so yummy:
In this restorative version of the final resting pose, your head, knees, and ankles are supported to facilitate complete relaxation and surrender. Placing a bolster or cushion under your knees alleviates pressure in your lower back, and supporting the ankles allows your lower legs to rest without any muscular effort.
You’ll need:
— a bolster or cushion
— 2 blankets
How to get into it:
Fold one of the blankets into a pillow for your head and place it at the top of your mat. (It should be just high enough so that your forehead is slightly above your chin when you lie down.) Fold and roll the other blanket, and place it near the bottom edge of your mat. Place the bolster horizontally in front of it.
Lie on your back with your head on the “pillow” blanket, knees resting on the bolster, and ankles resting on the rolled blanket. Set a timer for 7 minutes, close your eyes, and simply follow your breath as it flows in and out.
When the timer is up, slowly roll to one side, take a few deep breaths into the back body, and use your top arm to gently push yourself up.
To finish the sequence, come into a comfortable seated posture (you may wish to sit on a bolster or folded blanket). Place your palms together in Anjali mudra (prayer pose) and enjoy a few deep, conscious breaths. Notice the quality of your body, mind, and breath. When you’re ready, bow your head and give thanks to yourself for taking time to rest and restore. Namaste.
More yoga tutorials: Yoga to Correct Rounded Shoulders
Yoga Stretches to Relieve Tense Calves and Shins
Yoga for Acne: 12 Poses for Clear Skin
Get more like this–sign up for our newsletter for exclusive inspirational content!
__
Photo: Annika Ihnat